Quick Start
Welcome to HPC-AI.com. Unlock the world of computing power with our robust and cost-effective GPU cloud platform. Designed for artificial intelligence, high-performance computing, and other compute-intensive applications, our platform empowers you with a suite of tools and amazing features to make your workflow in computation applications easy-to-use and efficient.
Follow these steps to begin your computing journey and navigate the power of HPC-AI!
Step 1: Create an Account
Start by creating an account to access and manage all your resources.
- Go to the Sign-Up Page and fill in your details. You can also sign up using your Google Account.
- Verify your email address to activate your account.
- Log in to the platform to begin setting up your cloud environment.
Step 2: Add Funds to Your Account
Get ready to deploy your resources by ensuring your account has sufficient funds. Our platform currently supports payments via Stripe using Credit/Debit Cards, Google Pay, and Link for quick and easy transactions. We will be supporting PayPal, WeChat Pay, and Alipay in the near future to offer even more payment options for our users.
Add Funds
- Log in to your account and open the Console.
- Navigate to Bill → Transaction in the sidebar.
- Click on the Top Up button in the top right corner.
- Follow the instructions to complete the transaction with your preferred payment method.
Automatic Payment
To avoid machine disruption caused by insufficient balance, we recommend set up automatic payment.
- Go to Billing Overview page and locate the Payment Methods section.
- Click Add Card and fill up your payment information. Once added, automatic payment will be enabled, and this card will become your default payment method.
- Find the Automatic Payment section in the Account Overview page and click Manage to configure your balance threshold and top-up amount. If your balance falls below the set threshold, the system will automatically top up your customized amount using your saved payment method. The system checks balances once per hour.
Promotions
Now is the perfect time to get started with some free credits to explore our platform. Sign up, top up, and receive vouchers to boost your projects and workflows. For the specific voucher amounts and details, please visit our main page at HPC-AI.COM.
Don’t miss out - start exploring the world of computing power today.
For billing information, visit the Billing page or check the FAQ section.
Step 3: Deploy Computing Resources
With your account funded, you are ready to deploy and manage computing resources met to your needs. We offer two high-performance computing resource types - NVIDIA H100 and NVIDIA H200 - to cater to different requirements for training and inference tasks.
Choose Resource Type
Not sure whether to choose B200 or H200? Here’s a quick comparison:
-
NVIDIA B200: Optimized for extreme-scale AI computing with increased GPU memory (180 GB vs. 141 GB in H200). Leveraging the all-new Blackwell hardware architecture and high-efficiency FP4 precision, the B200 excels in handling trillion-parameter model inference. It delivers superior data throughput in scenarios such as high-concurrency conversational AI requests and large-scale distributed cluster training.
-
NVIDIA H200: Optimized for both training and inference with enhanced GPU memory (141 GB). The H200 excels in scenarios requiring massive parallel processing and fast I/O operations, such as multi-instance distributed training and real-time AI inference.
For detailed machine configurations, please visit our main page at HPC-AI.COM.
With your GPU type selected and the key differences between B200 and H200 in mind, let’s set up the necessary configurations to instantiate your computing machines.
Now, we will walk through the steps to configure your SSH key, create Storage Volume, and launch your instance.
Setup SSH Key
To access your instance via SSH, please upload your local SSH key to your account.
1. Check for existing SSH keys:
Open terminal on your local machine and run the following command to see if you already have SSH keys:
$ ls -al ~/.ssh
This will list the files in your .ssh directory. Check the directory listing for the existing public SSH key, which should be:
id_rsa.pub
If this file exists, you can use the corresponding private key to authenticate via SSH.
2. If you don't have an SSH key, generate one:
If no public keys are found or you want to generate a new one, use the following command to create a new SSH key.
$ ssh-keygen -o
- When prompted to Enter a file in which to save the key, press Enter to accept the default location or specify a custom name.
- Enter a secure passphrase when prompted.
Example output:
Generating public/private rsa key pair.
Enter file in which to save the key (/home/your_user/.ssh/id_rsa): [Press Enter]
Enter passphrase (empty for no passphrase): [Type passphrase]
Enter same passphrase again: [Re-enter passphrase]
3. Copy the public key to the clipboard:
To copy your public key, run:
$ cat ~/.ssh/id_rsa.pub
Copy the entire output from ssh-rsa to the end.
Example output:
ssh-rsa AAAAB3NzaC1yc2EAAAADAQABAAABgQCHQamrrVOq16aEgDA7JTHmbs2QEXX1TvTUj/Mnj2SD7j2KGx5ZGOi56NS5LLrKBGwWv9LGBIFSMfkpUXTtNPmbwDHkXzJQQxro/xFG6ggXXiiDiNVyuTsTgdtx9h7L43AOqLk6nD0UVX9zGnNSxKmug8kgXY2kFBXR63hRoiEc0m1sNxPn8Zxj1BxFs6UKxwWNqX9rOiG9SOl95v7EwrbkkPM0RkK4bmXtAkqgdSg4Gki8nwmMFIdU1HlvTQieDndc5Wg/qqFxVvB1waE6lefcAdo64gWk8aR72+5NxDCJGyT99WTDTpJLRoDXcw/wMeZncG9vw8ImdaUD22JC3kpnYqJhOznFdJ/cLE6puGWcU/AA3JPguSrq66GpIzwE4ptAqvN2E+yP3iLnp2AevGVto8gUzvUXtZV/i59yZ2APVDvL9iHS0ZD4nus//qwEleXwllLAd/xFHZ9Pucid9Kve2DBNH1NNyEU3O4fueNkISNH6poDfrHhdDEjKmbj+FnE= user@luchentech
Note: After adding or modifying the public key, any new instances will be affected immediately. However, running instances will NOT be affected until they are restarted.
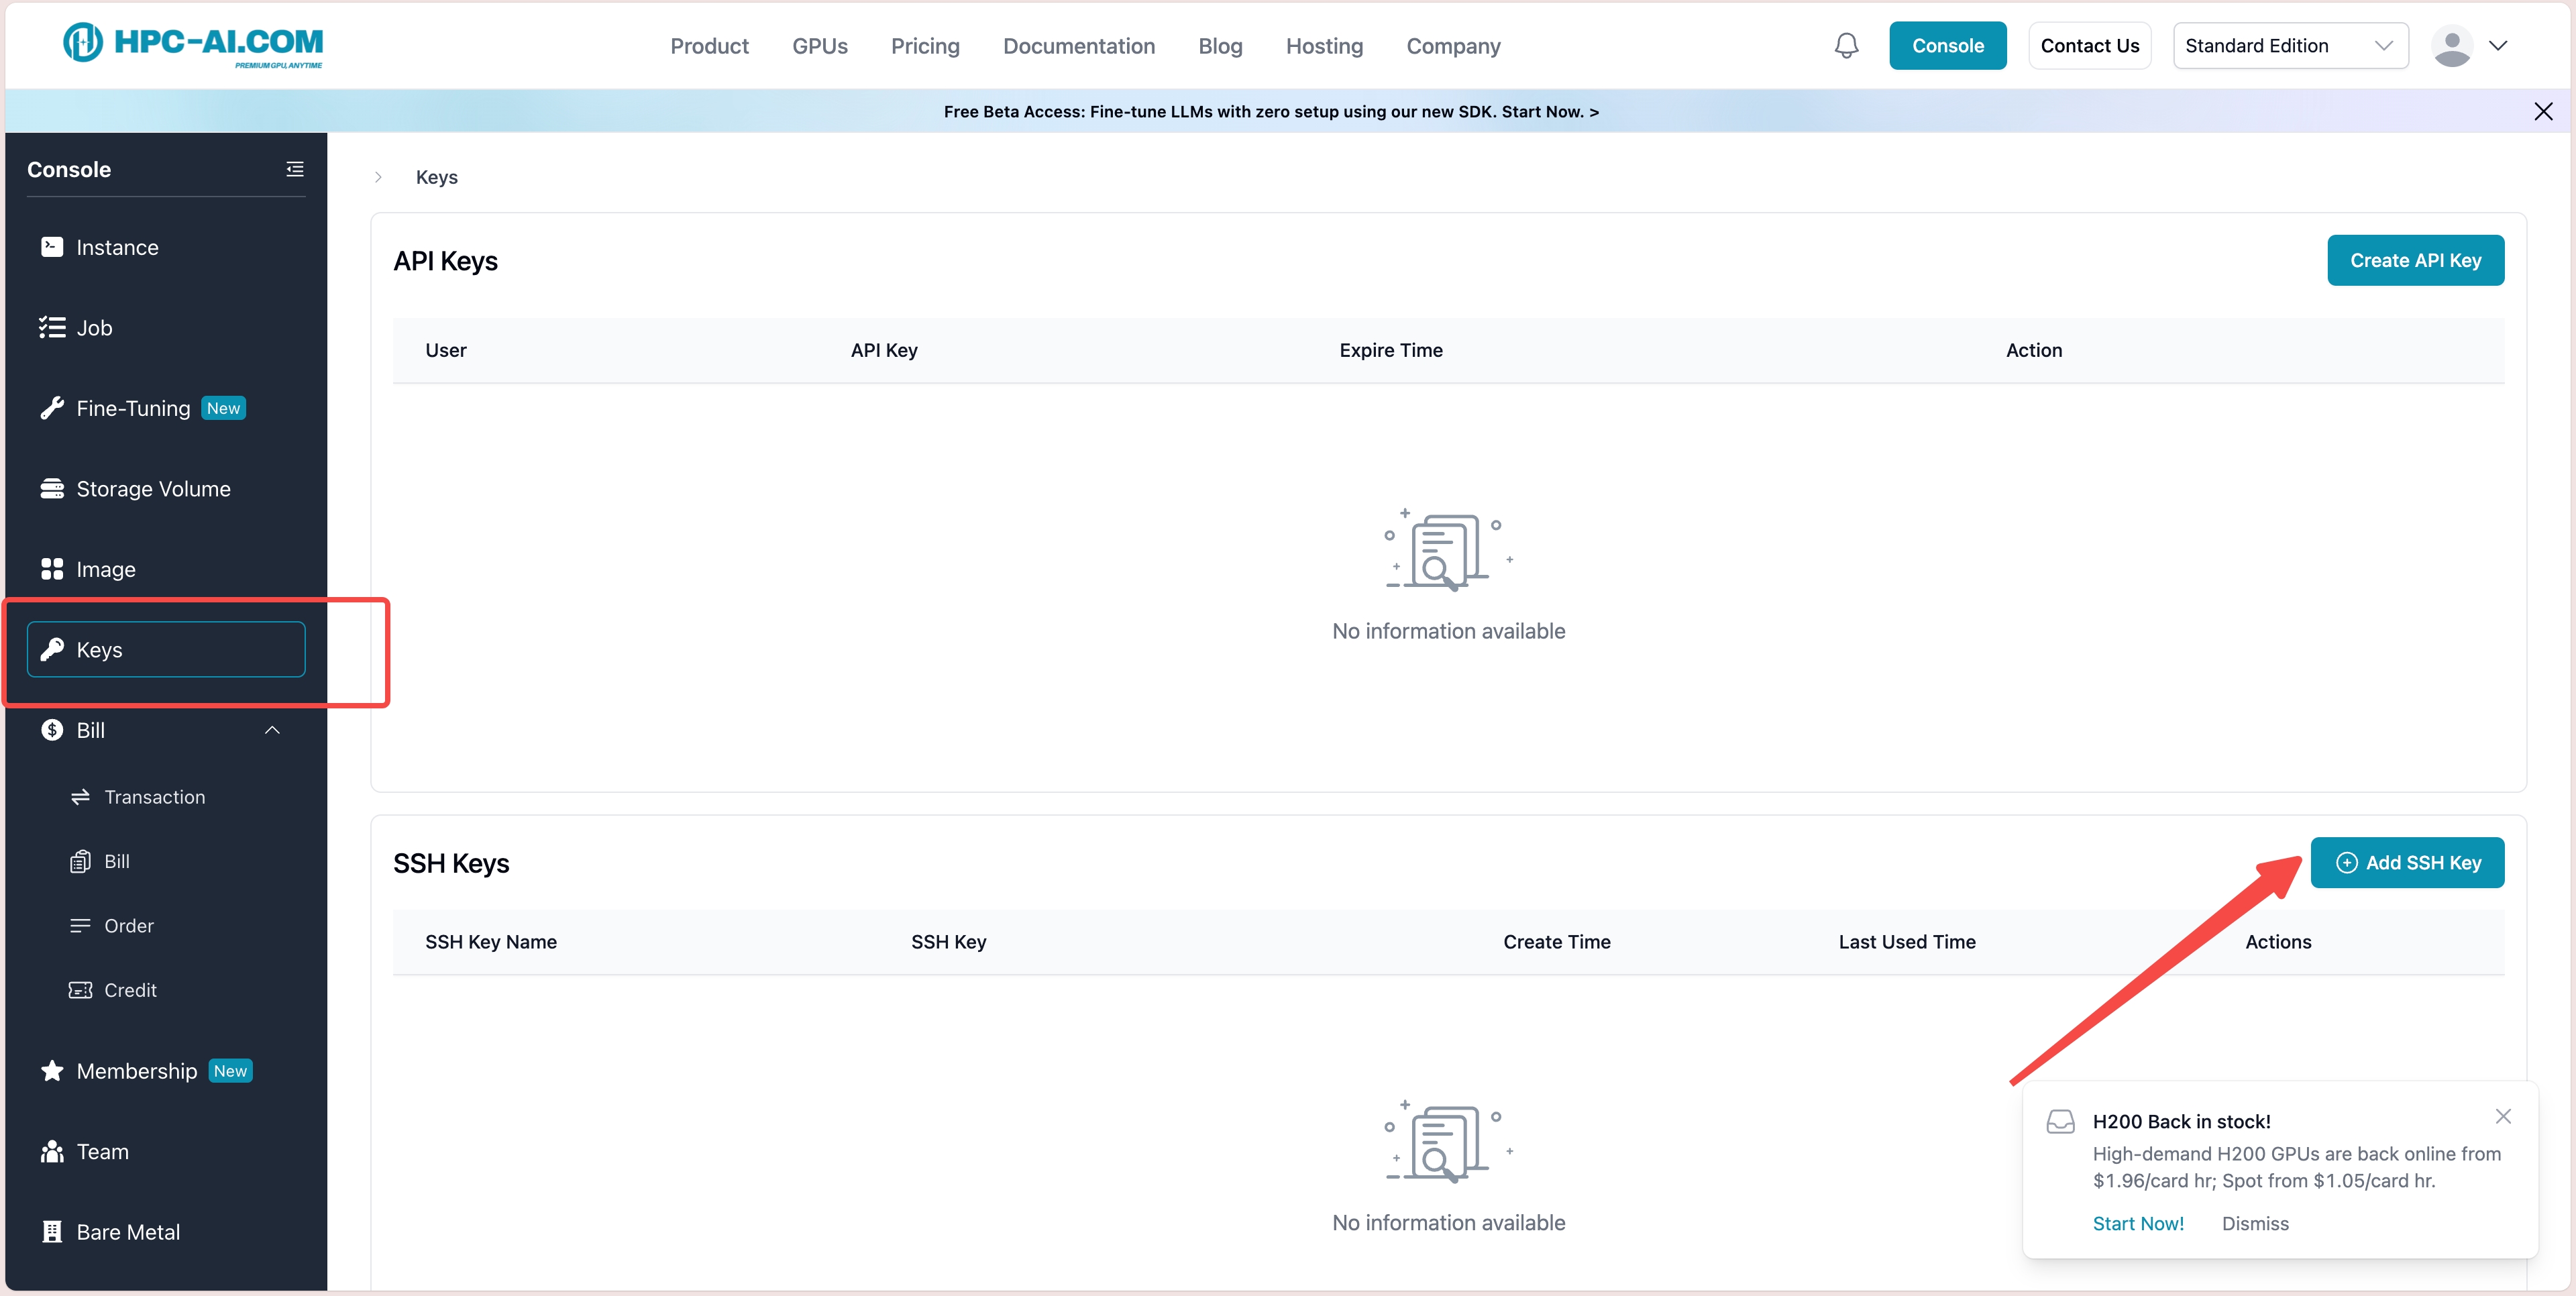
4. Navigate to the SSH Keys section:
Open the Console and select SSH Keys from the sidebar, then click Add SSH Key to upload your key.
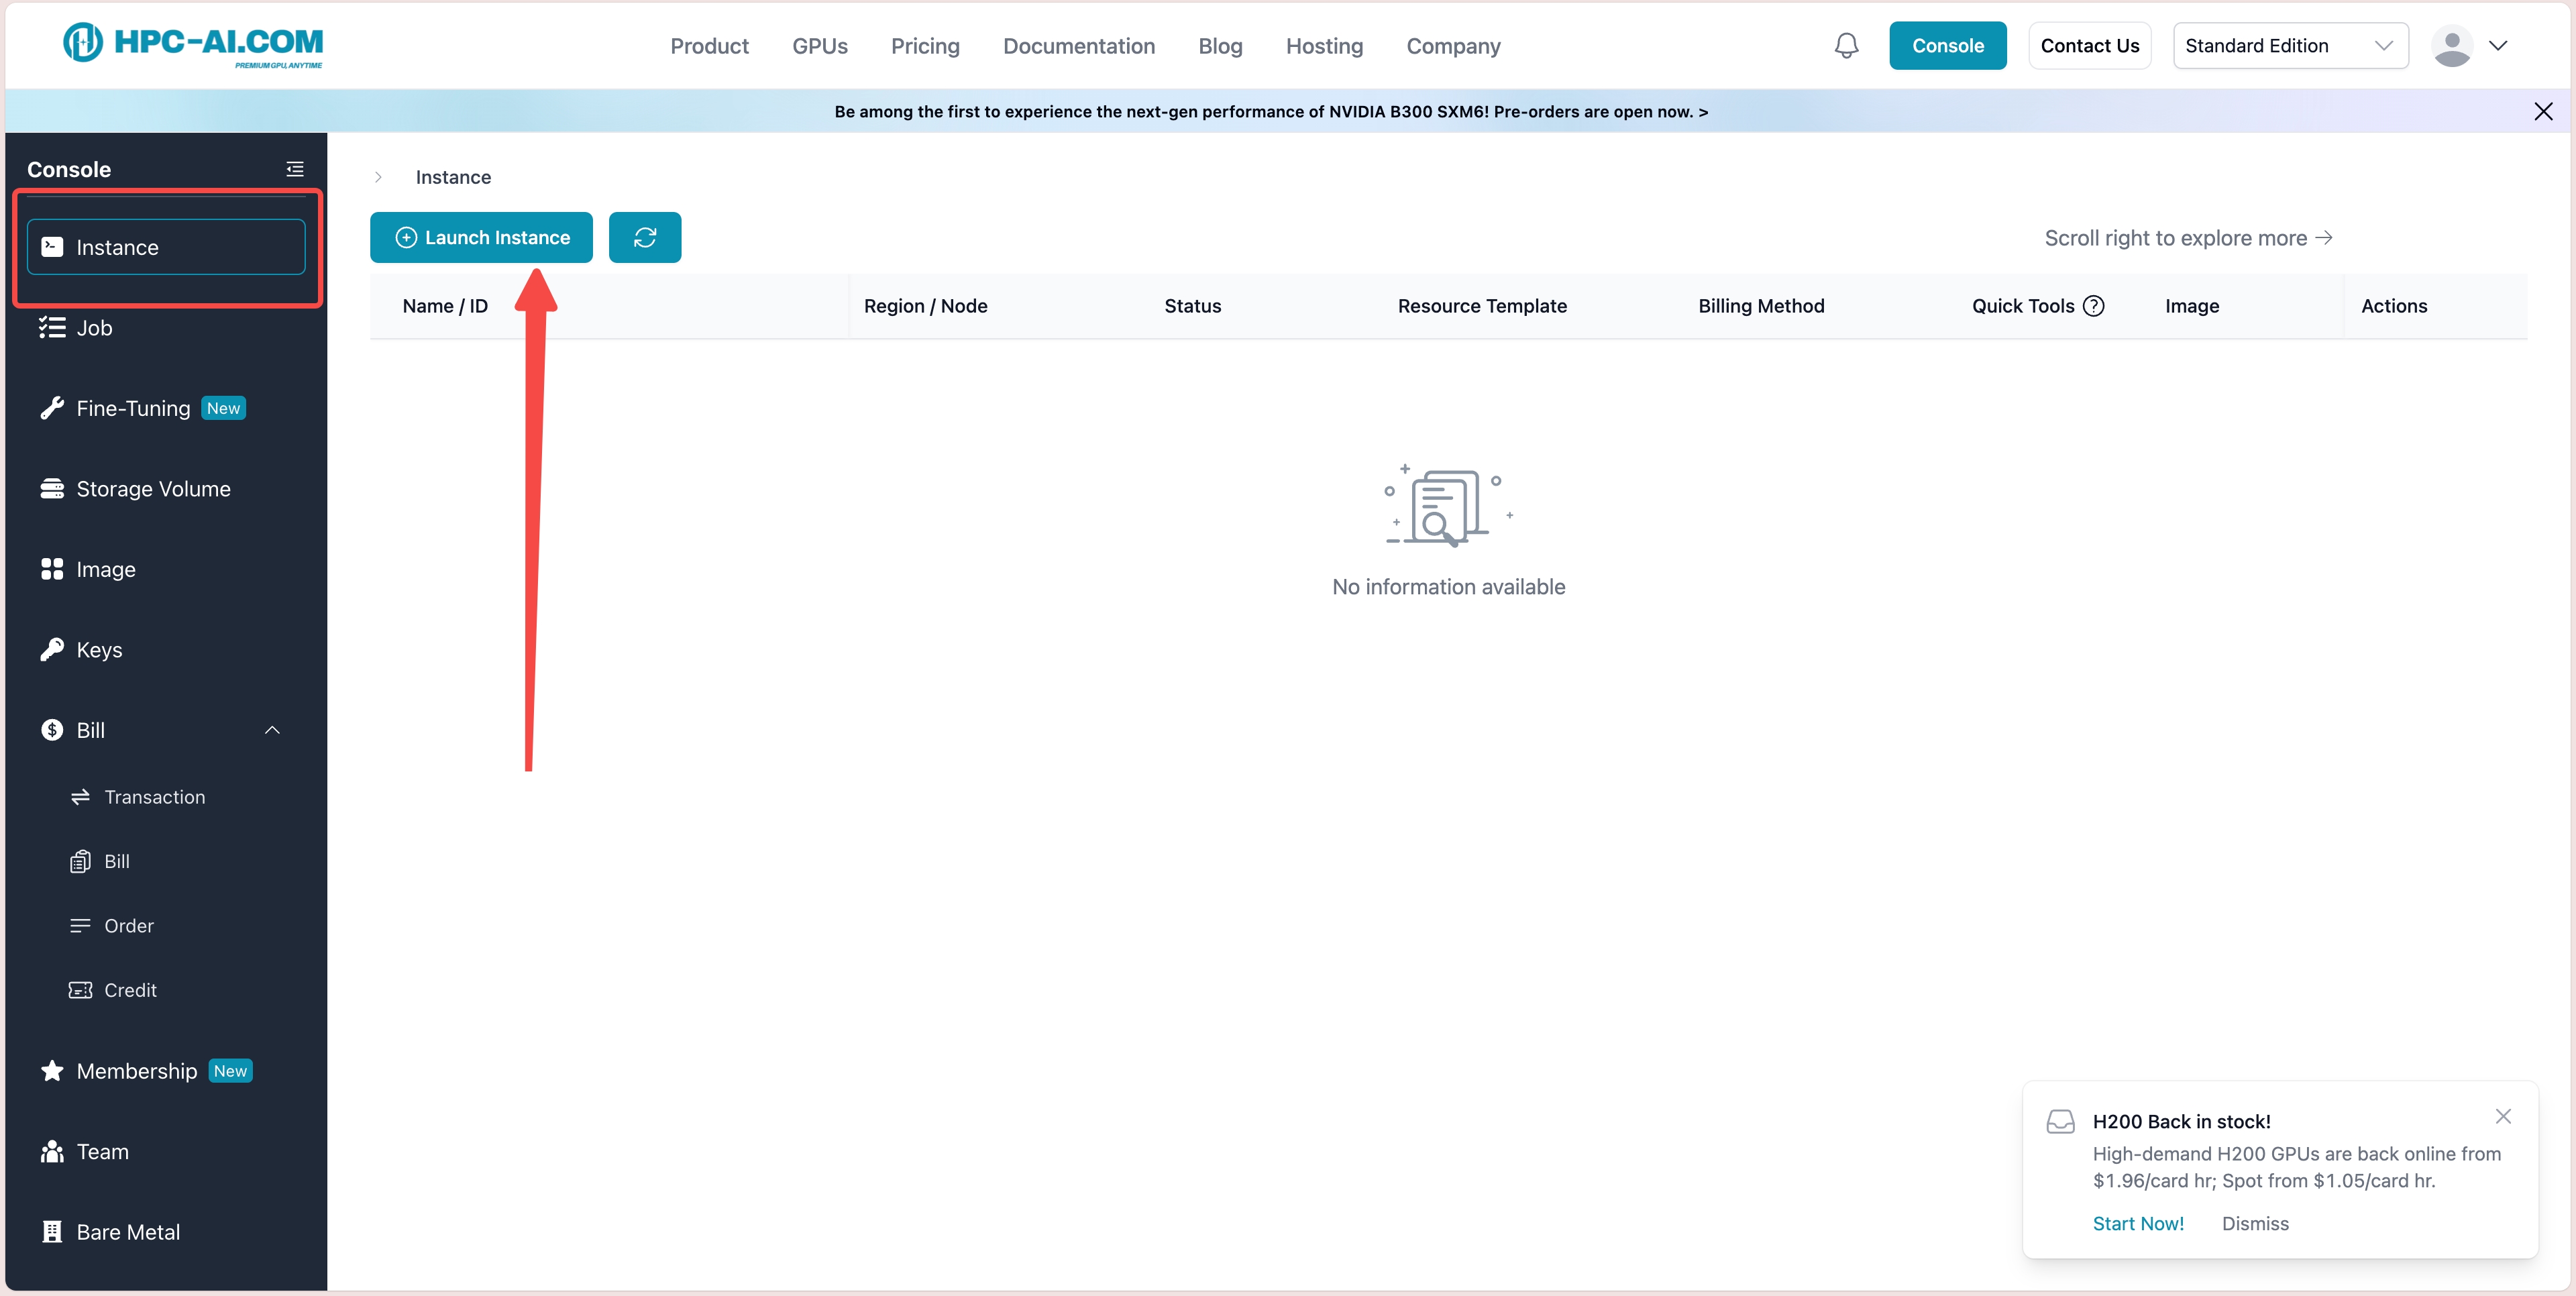
Create New Instance
1. Open the Console
Navigate to GPU Instances from the sidebar, then click Create GPU Instance.
2. Choose GPU Type, Region, and GPU Count
Select your preferred GPU type, region, and the number of GPUs for your instance. You also need to choose a billing mode:
-
Prepaid: Pay in advance for a fixed duration (by hour, day, week, or month) and use the resources for that period. If you stop the instance before the prepaid period ends and start it again later, you remain within the same billing cycle with no extra charge. When the prepaid period expires, the instance will automatically convert to On-Demand if that billing type is supported for the instance type; otherwise, the instance will be stopped automatically.
-
On-Demand: Pay-as-you-go billing. Resources are available on demand with no upfront commitment, and you are charged by the minute for actual usage.
-
Spot: A type of interruptible, spot instance. When capacity is tight, Spot instances can be preempted by Prepaid or On-Demand instances. Spot pricing varies with supply and demand and is typically lower, making it suitable for workloads that can tolerate interruption.
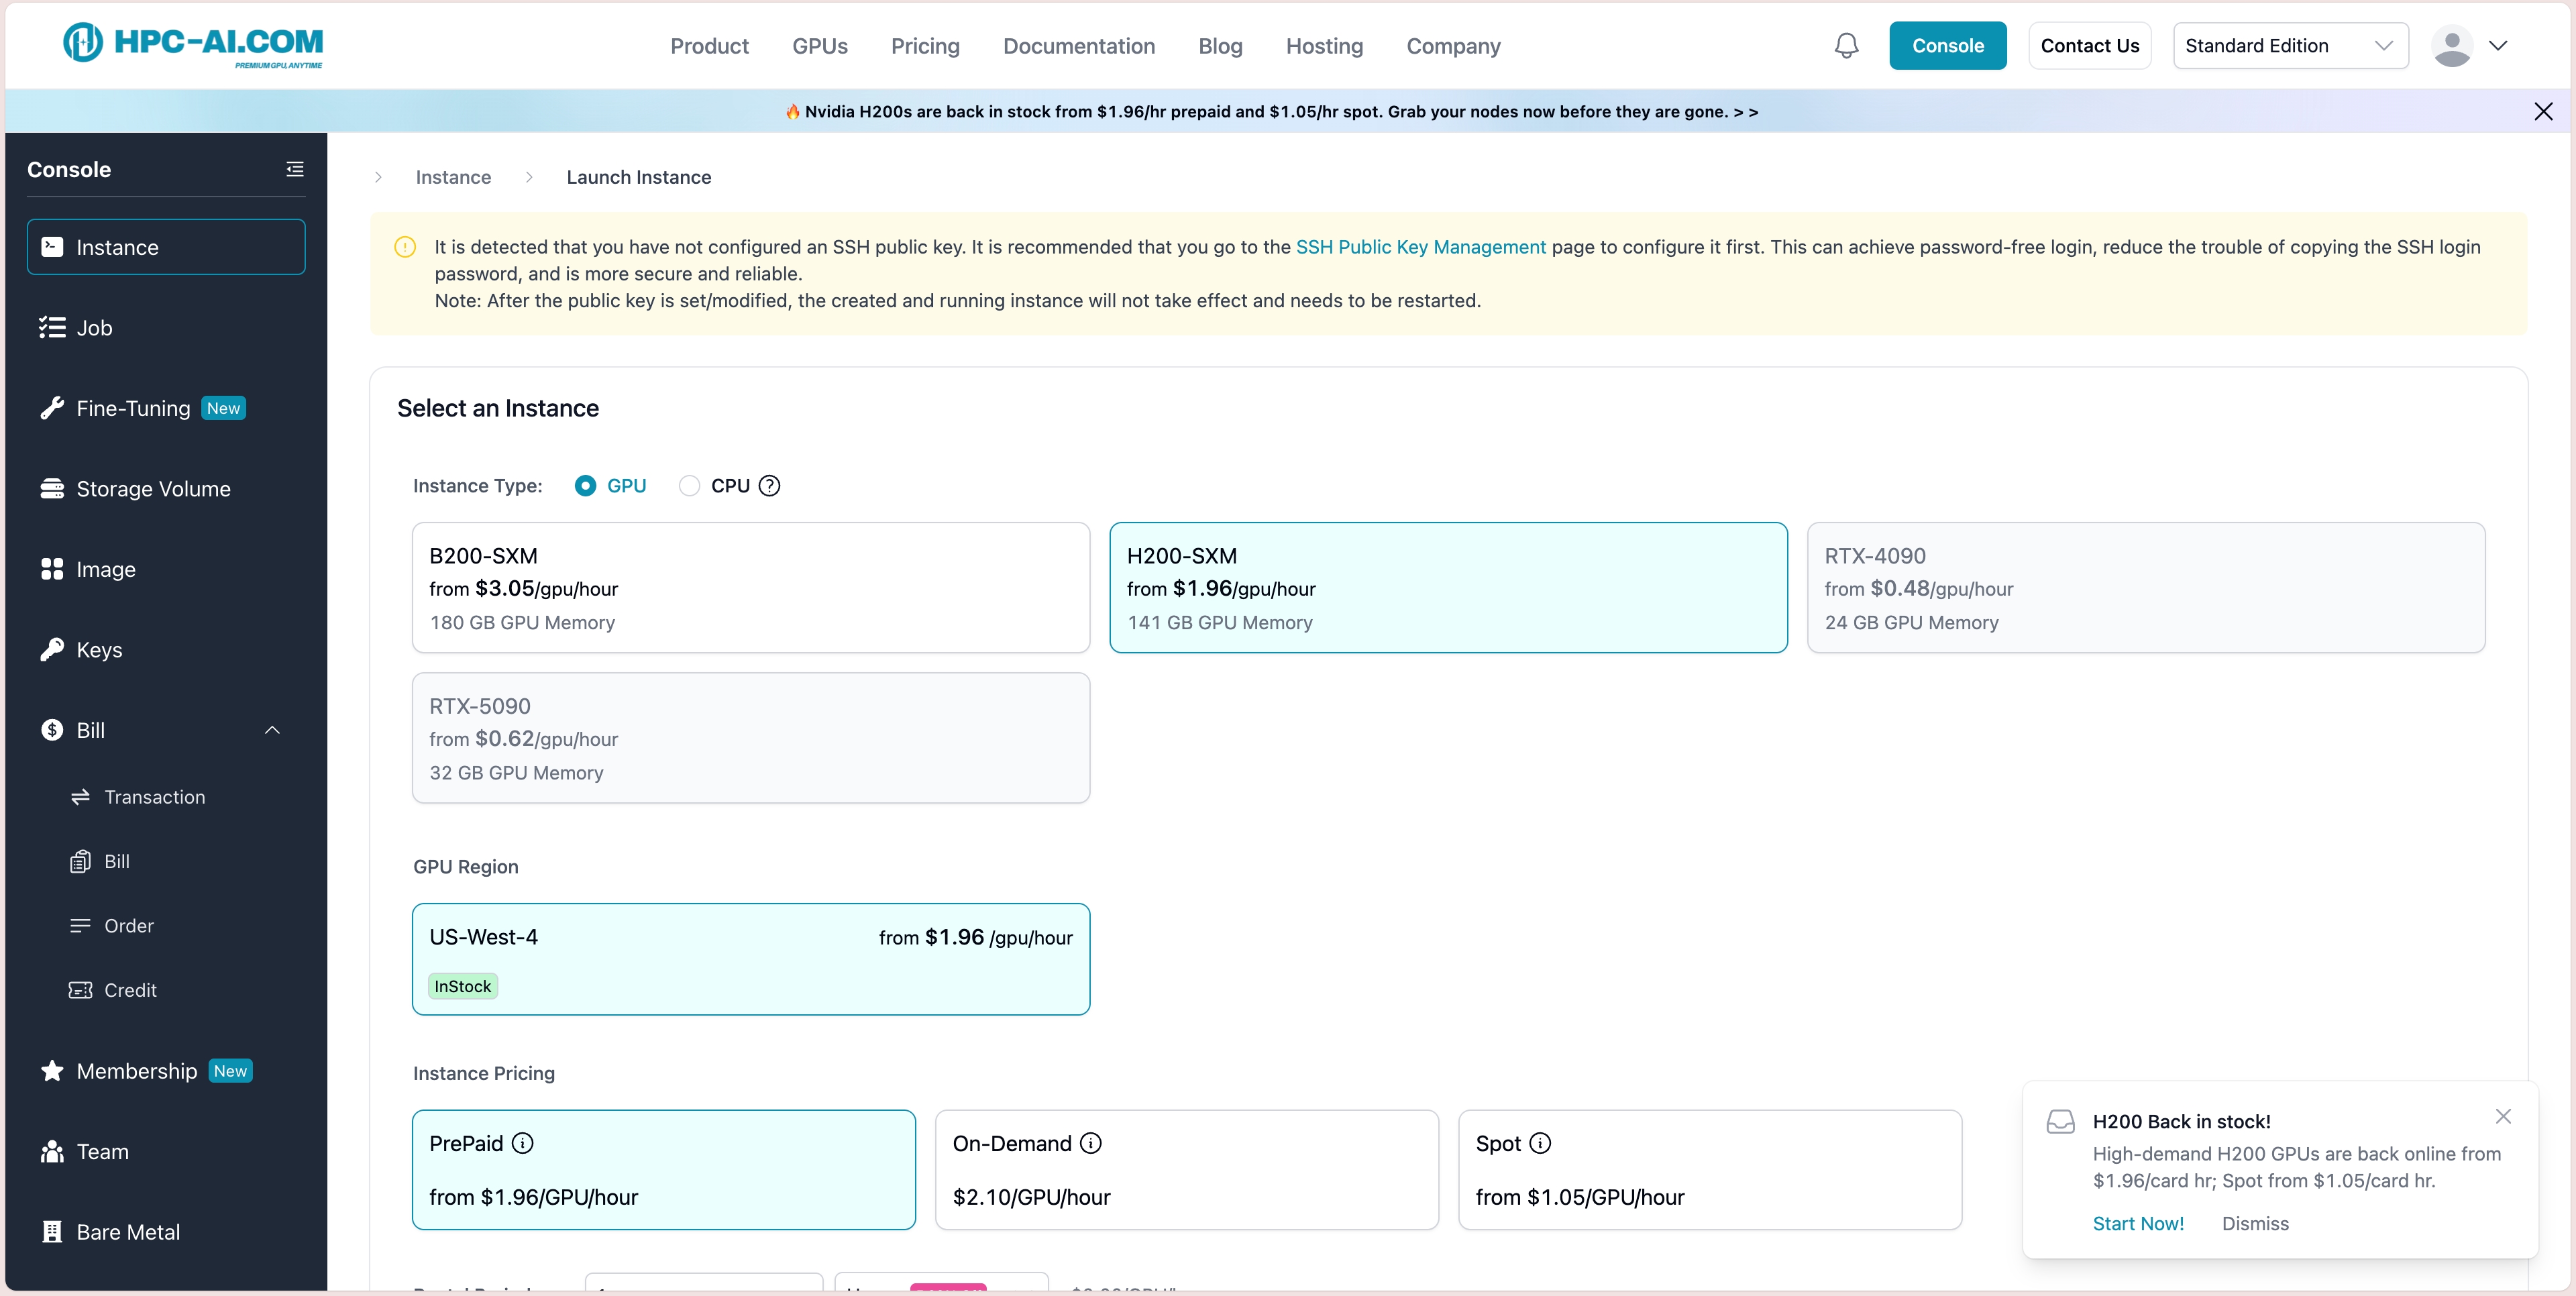
After choosing the billing mode, select your GPU type, region, and GPU count as shown in the console.
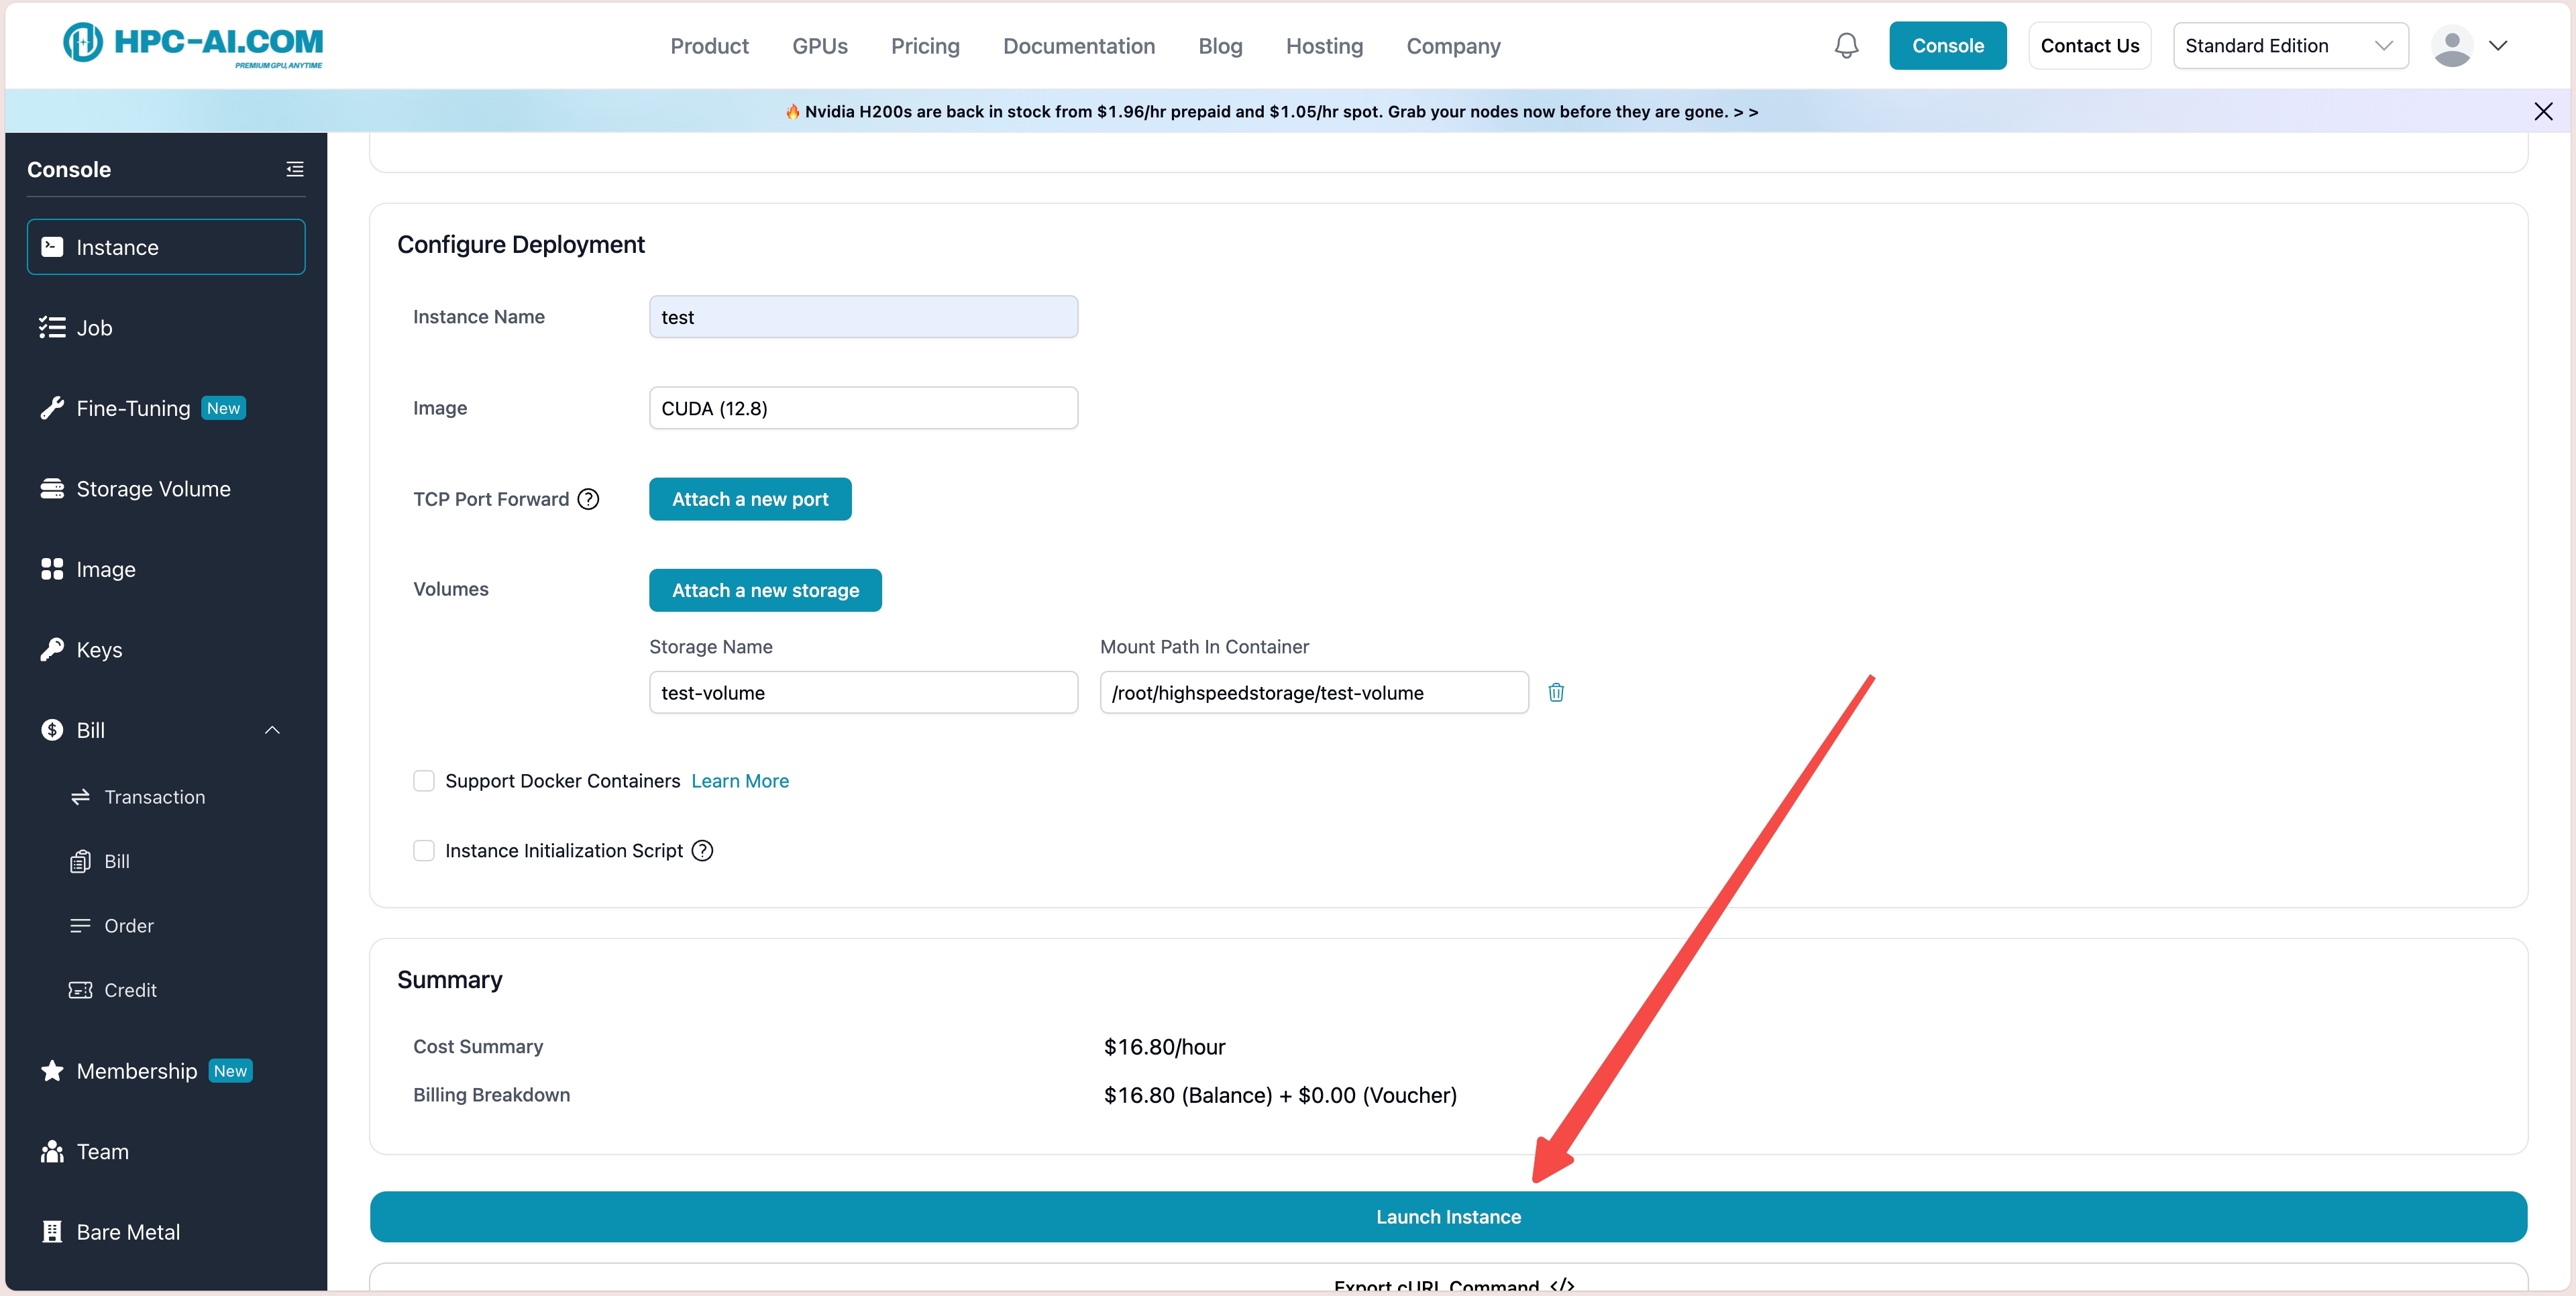
3. Configure Instance Name and Image
Create a name for your instance and choose the image that best suits your needs.
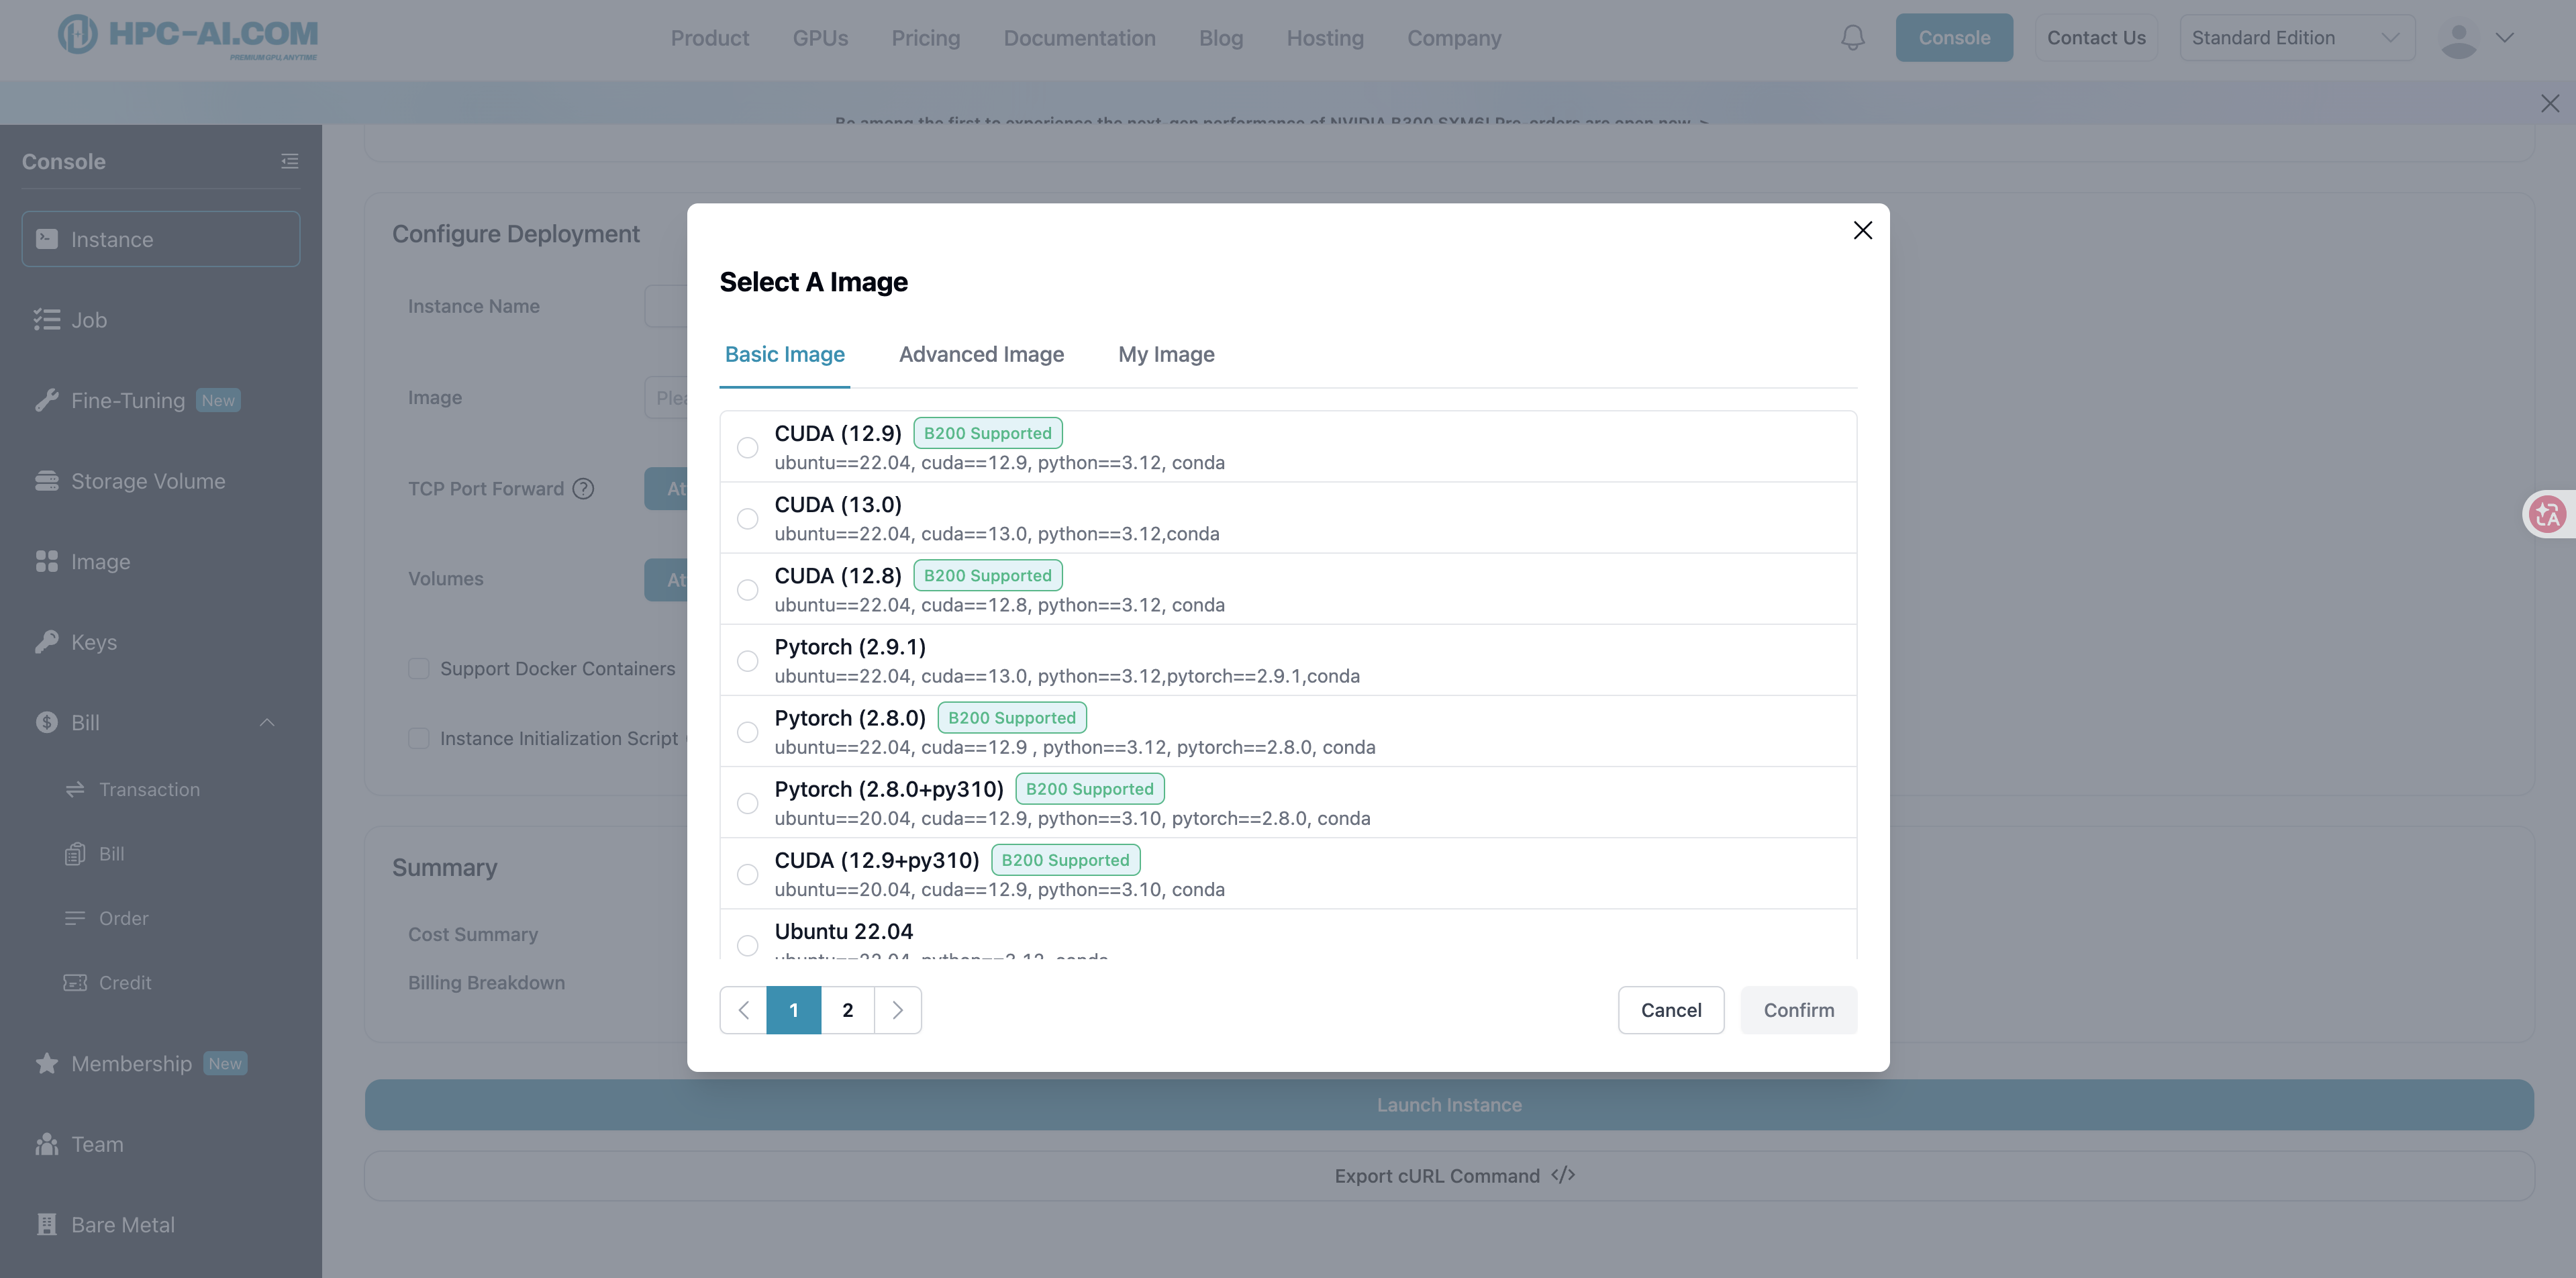
We provide a variety of pre-configured images, including popular options like different versions of CUDA, PyTorch, Colossal-AI and more, available for deployment with one click. If you want to use your own custom image, you can first create an instance, set up your environment inside it, then stop the instance and click More → Save image.
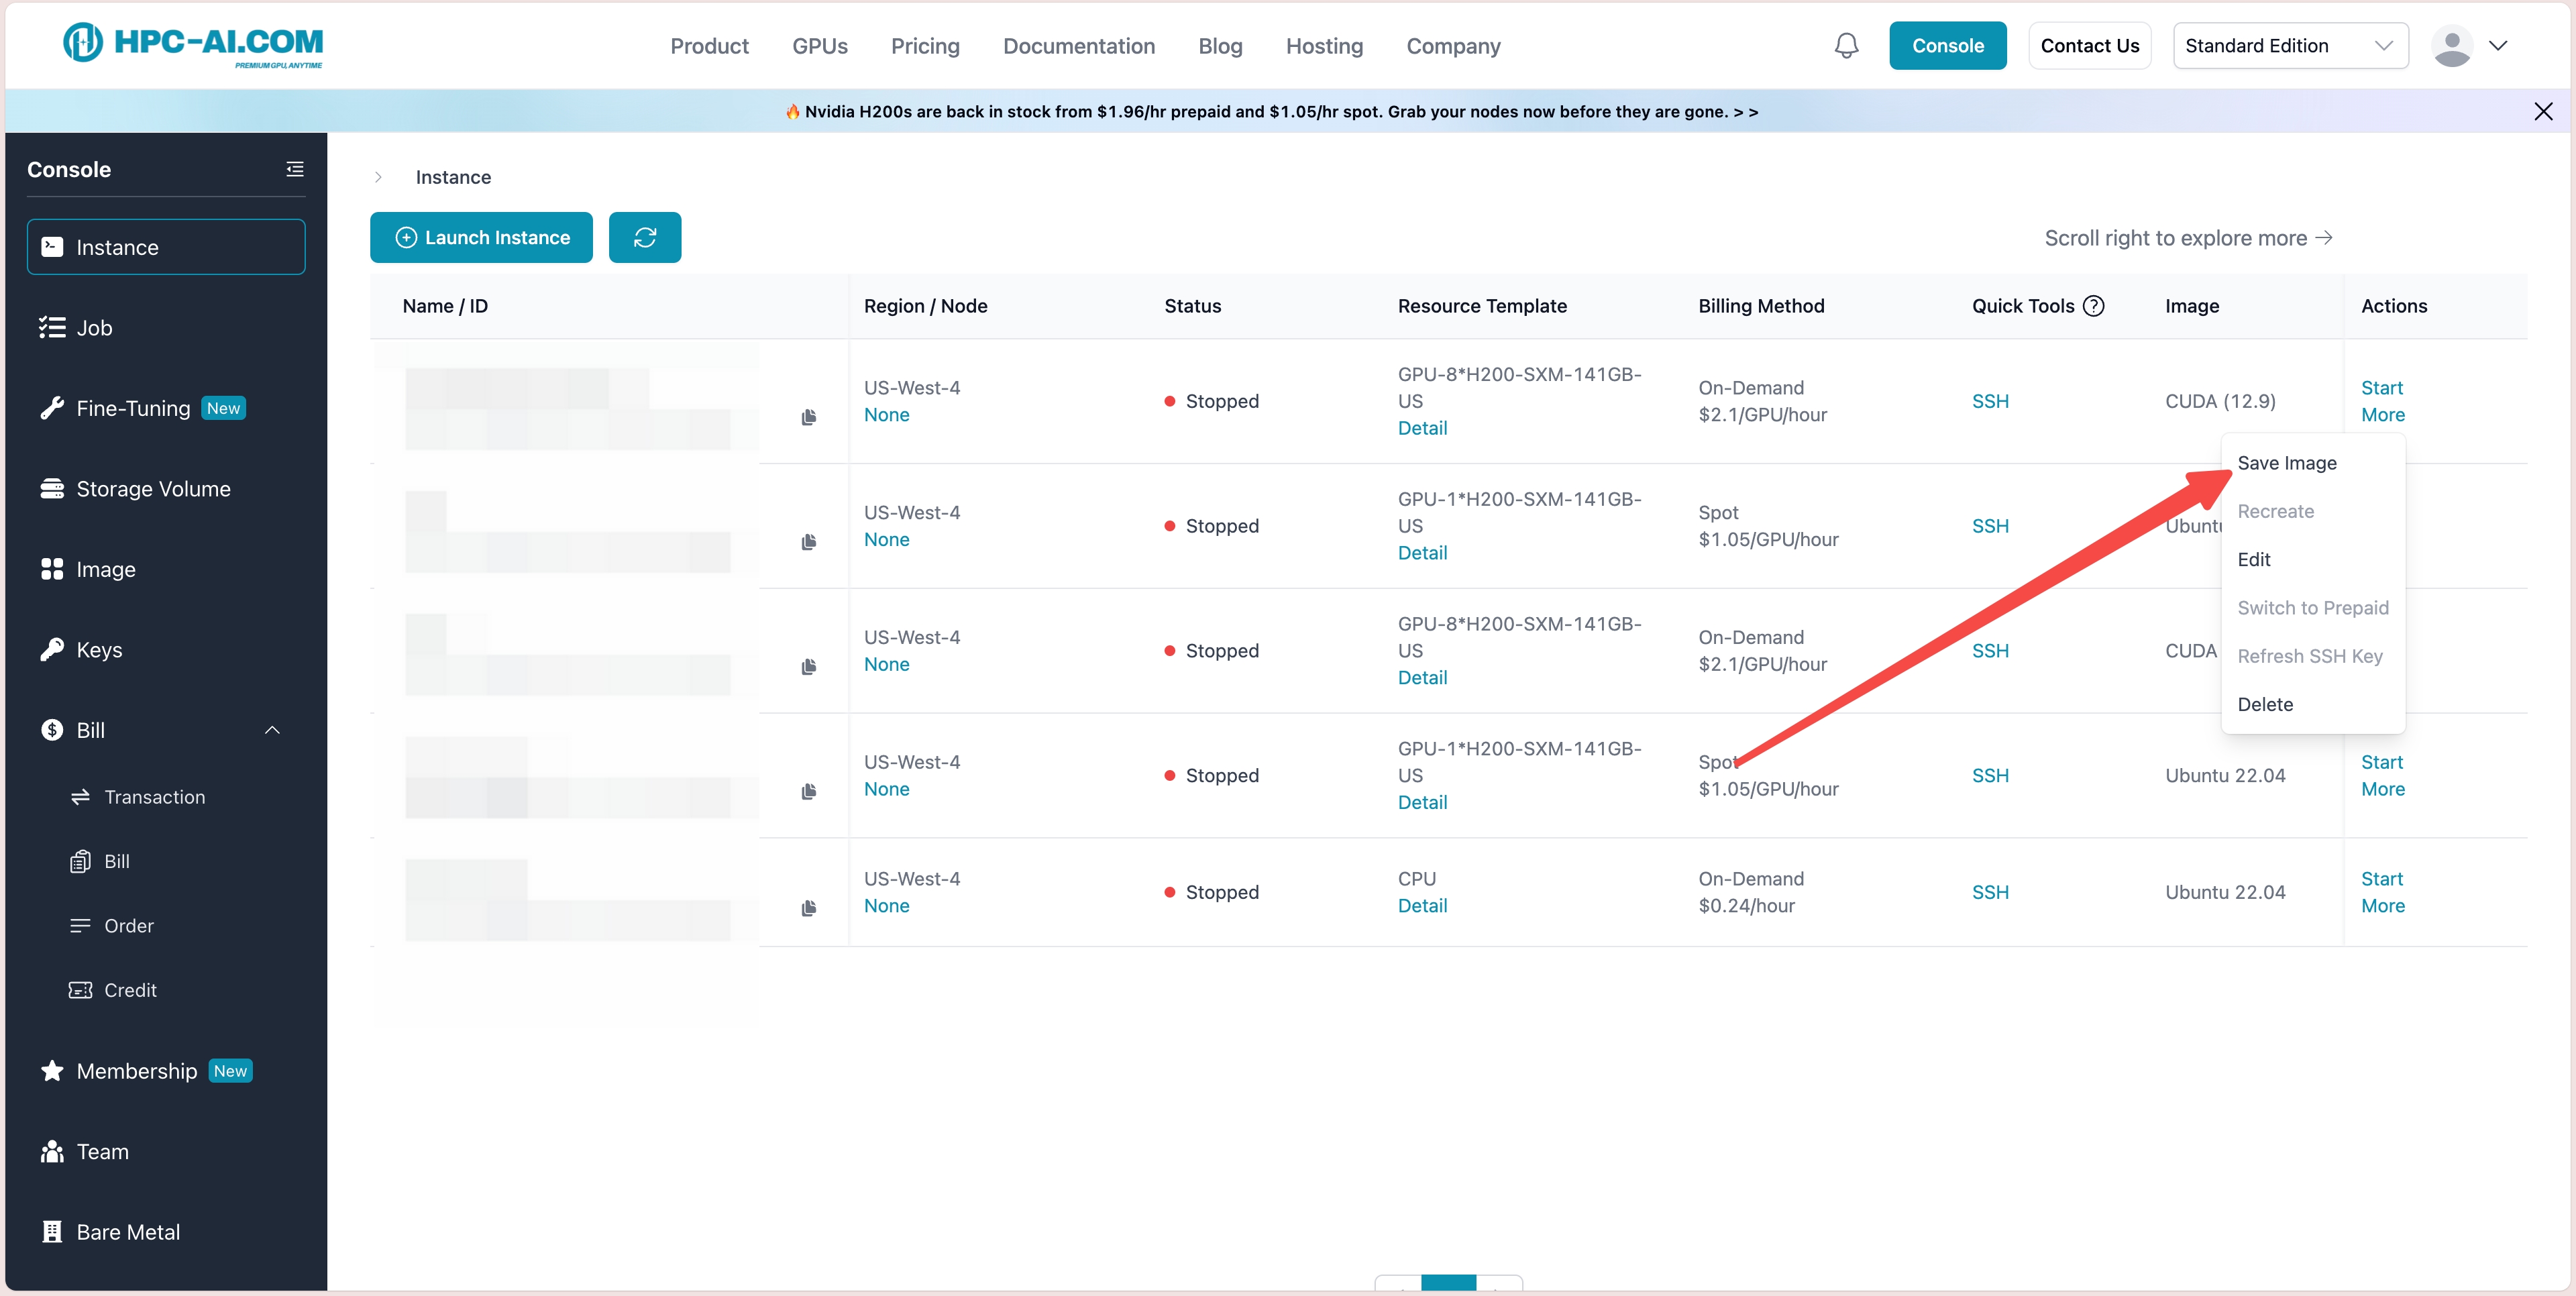
The image being built will appear under "My images" in the "Images" section of the sidebar.
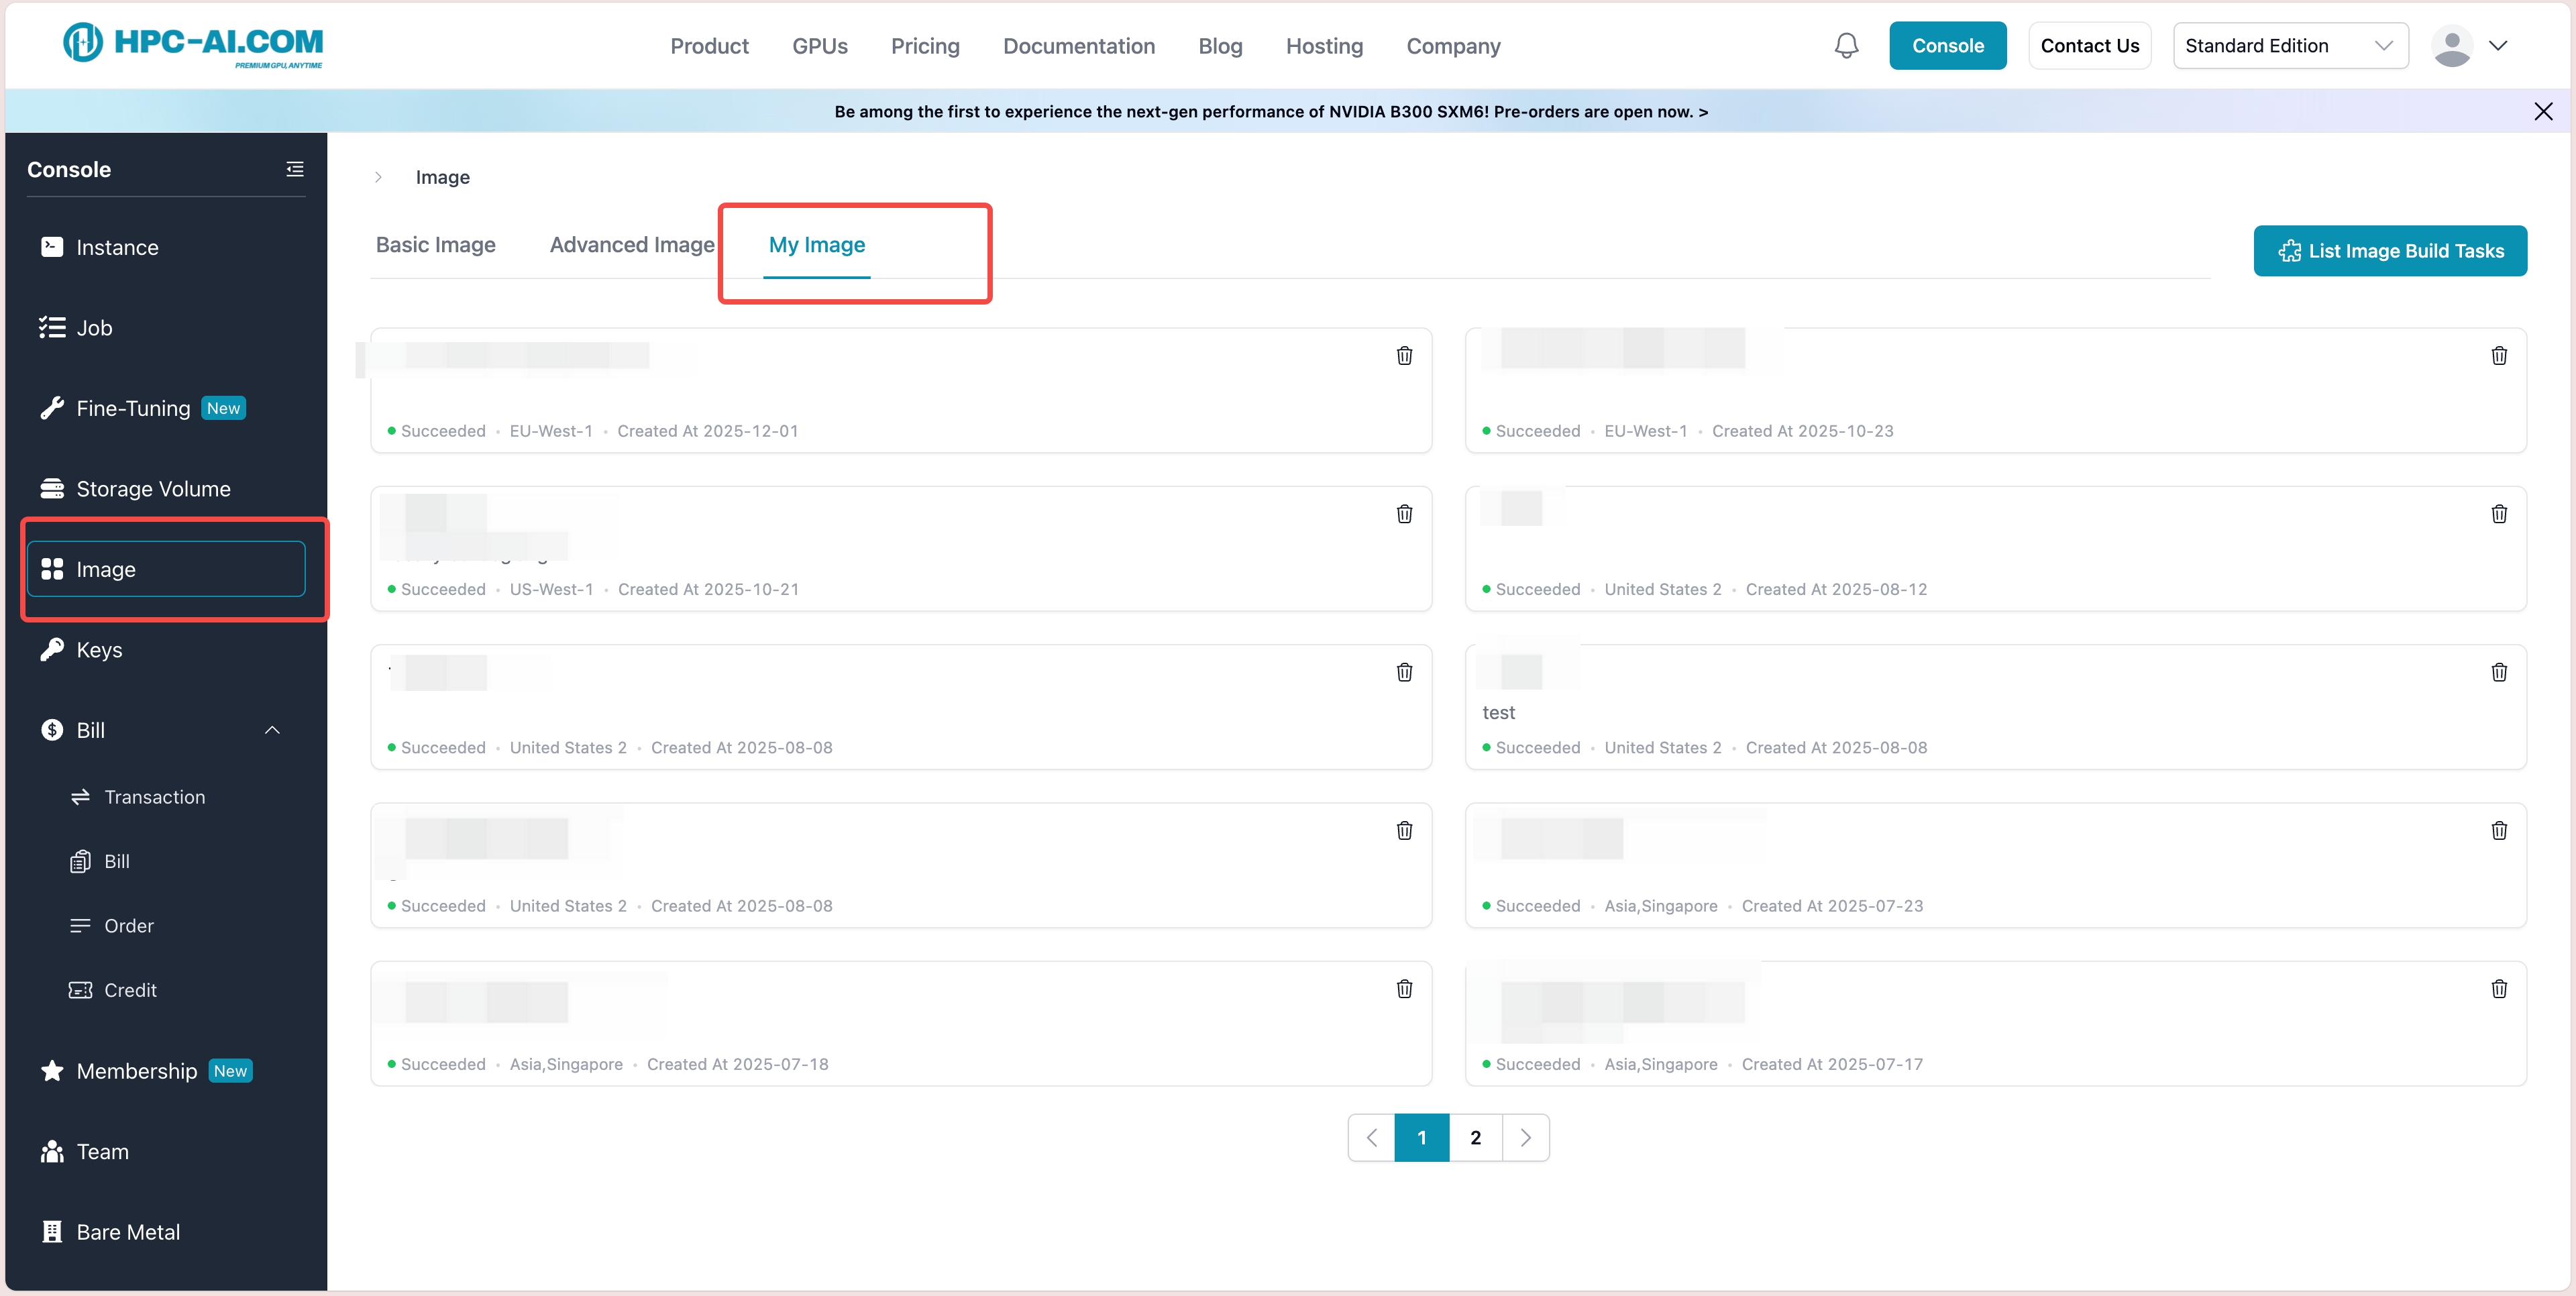
Note: Images can only be used within the same region.
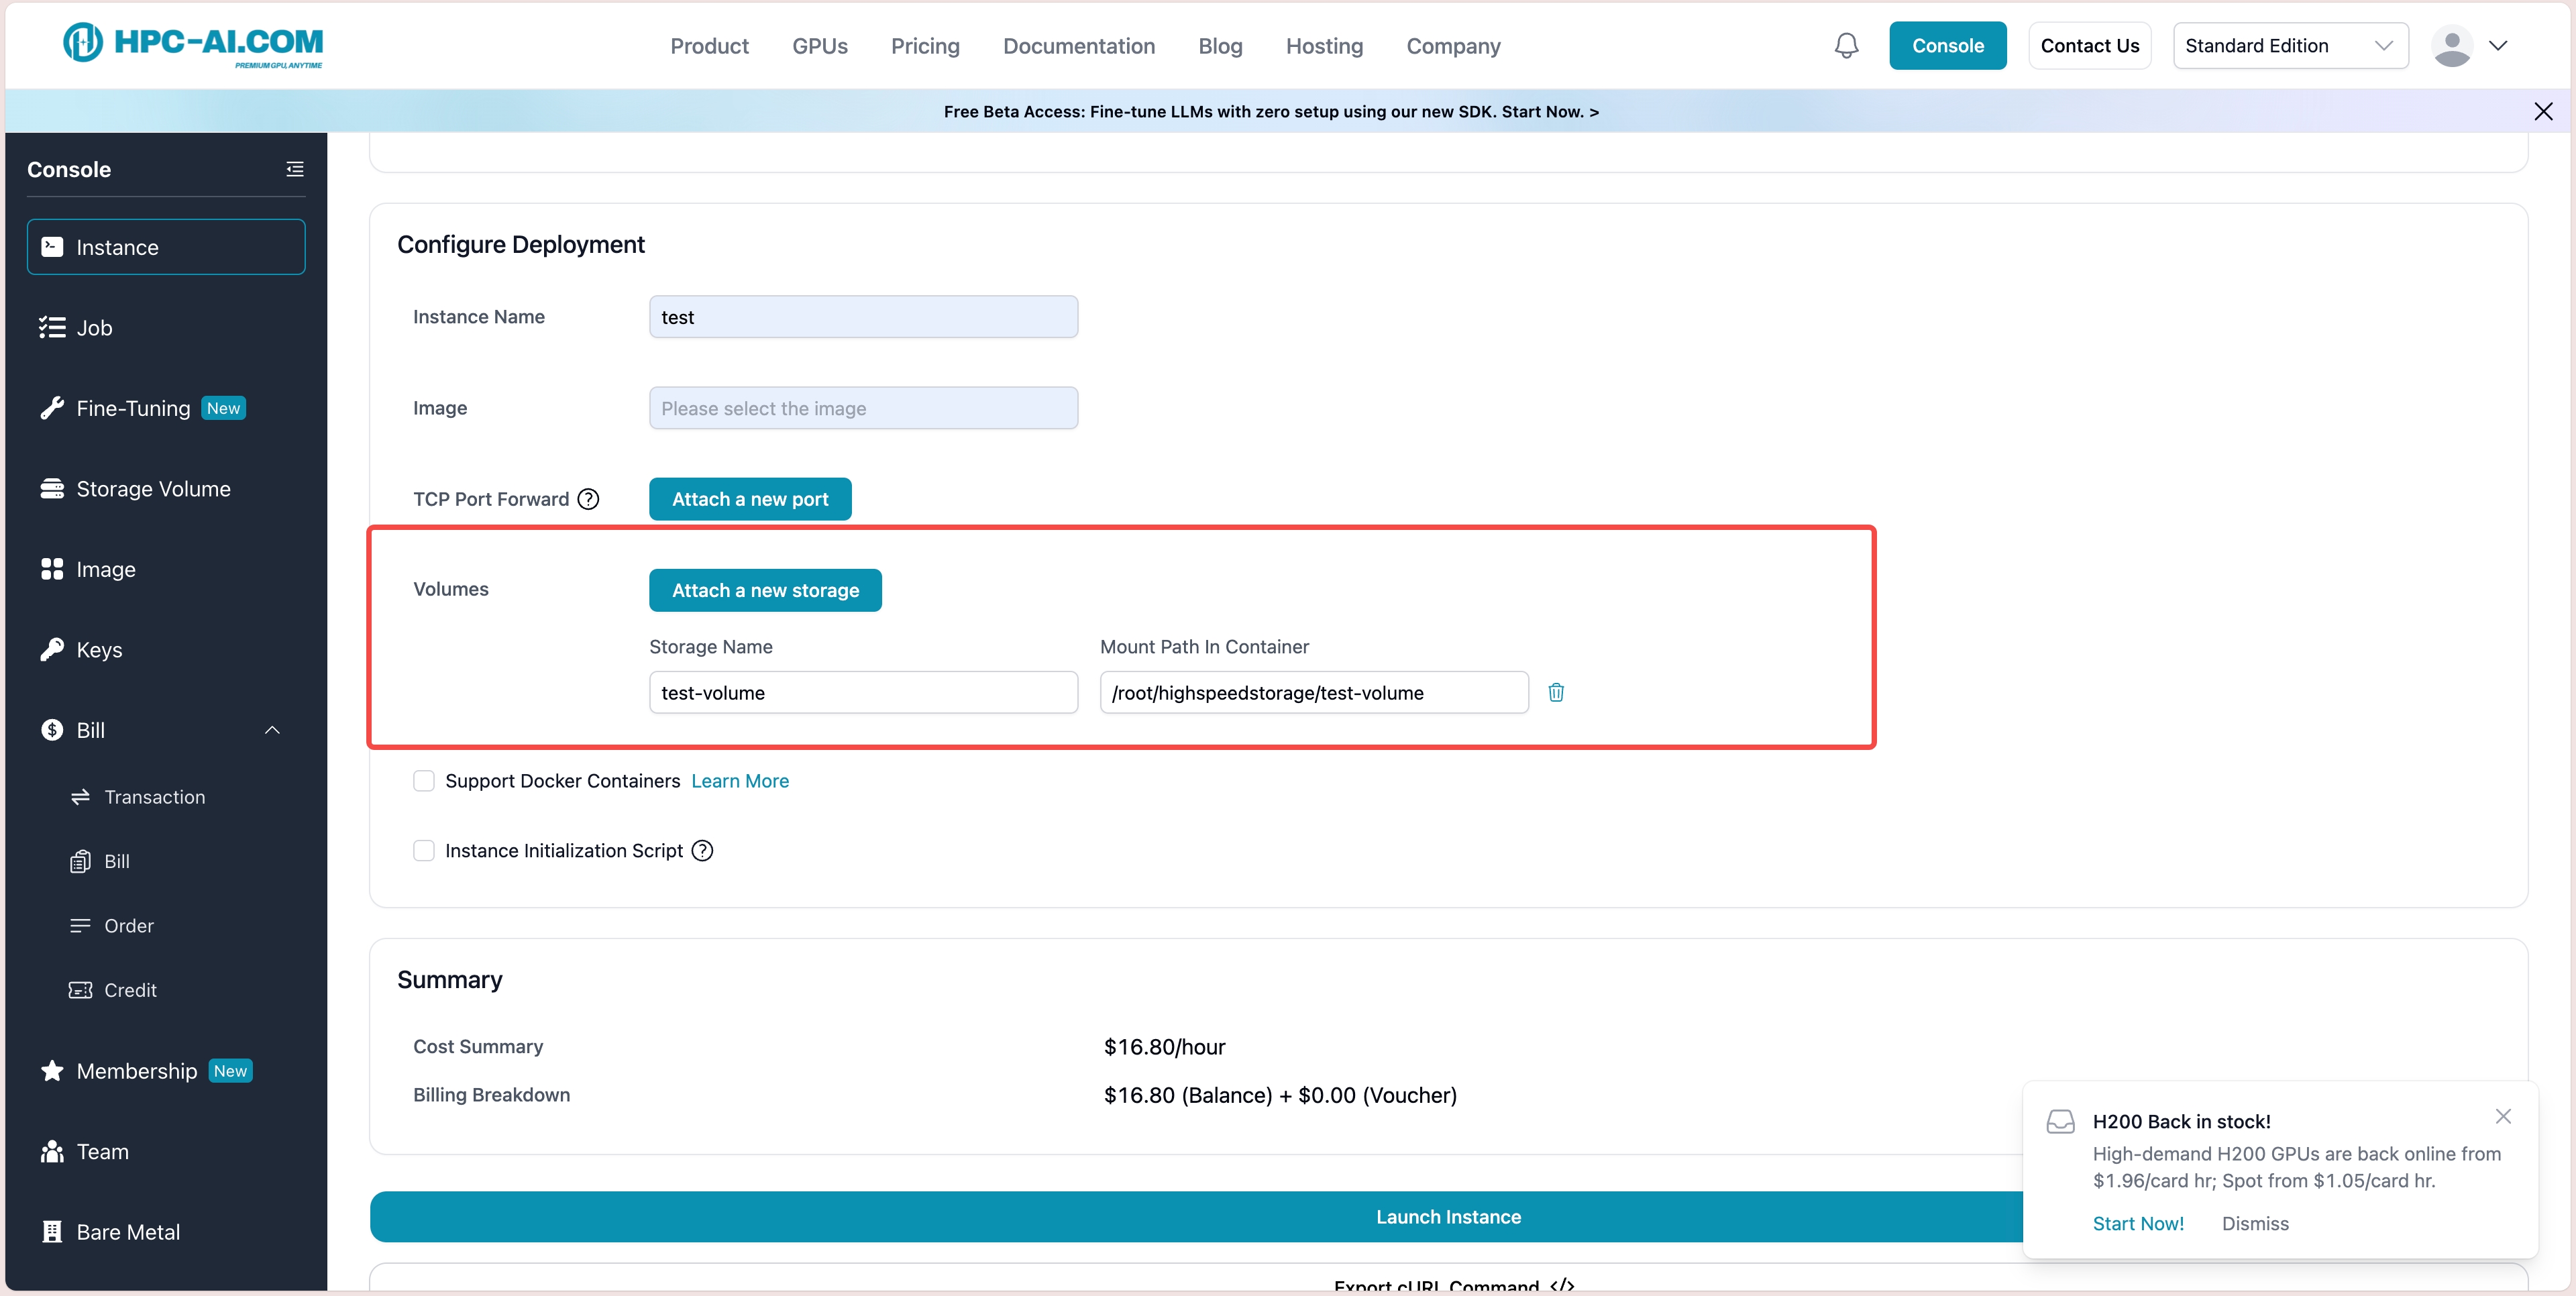
4. Select Storage Volume
Important: Data disks are not persistent once the instance is terminated. Attach Storage Volume to securely store your data.
- Ensure the Storage Volume is created in the same location as the instance to mount it successfully.
- For detailed instructions on creating Storage Volume, please visit this guide.
You can choose an existing Storage Volume or create a new one and mount it to the desired path.
5. Support Docker Containers
Instances support Docker functionality. For detailed instructions, see the Docker guide.
6. Launch the Instance
Review all configuration options and click Launch to proceed.
After launching, the instance will appear under the ** instance** tab. The initialization process typically takes 3-10 minutes. Once complete, you will gain access to your GPU resources, and billing will begin.
Create Storage Volume
Important: For On-Demand and Spot instances, the data disk is cleared when the instance is stopped. For Prepaid instances, the data disk is preserved until the prepaid period expires; stopping before expiry does not clear it, but stopping after expiry does. To keep your data across stop or expiry, we highly recommend using Storage Volume.
Storage Volume is a network-based solution for securely storing data and files. It offers the following key features:
-
Persistent Storage: Storage Volume can be mounted to instances, ensuring your data remains intact even after the instance is terminated.
-
Data Sharing Across Instances: Storage Volume allows you to share your data across multiple instances within the same region.
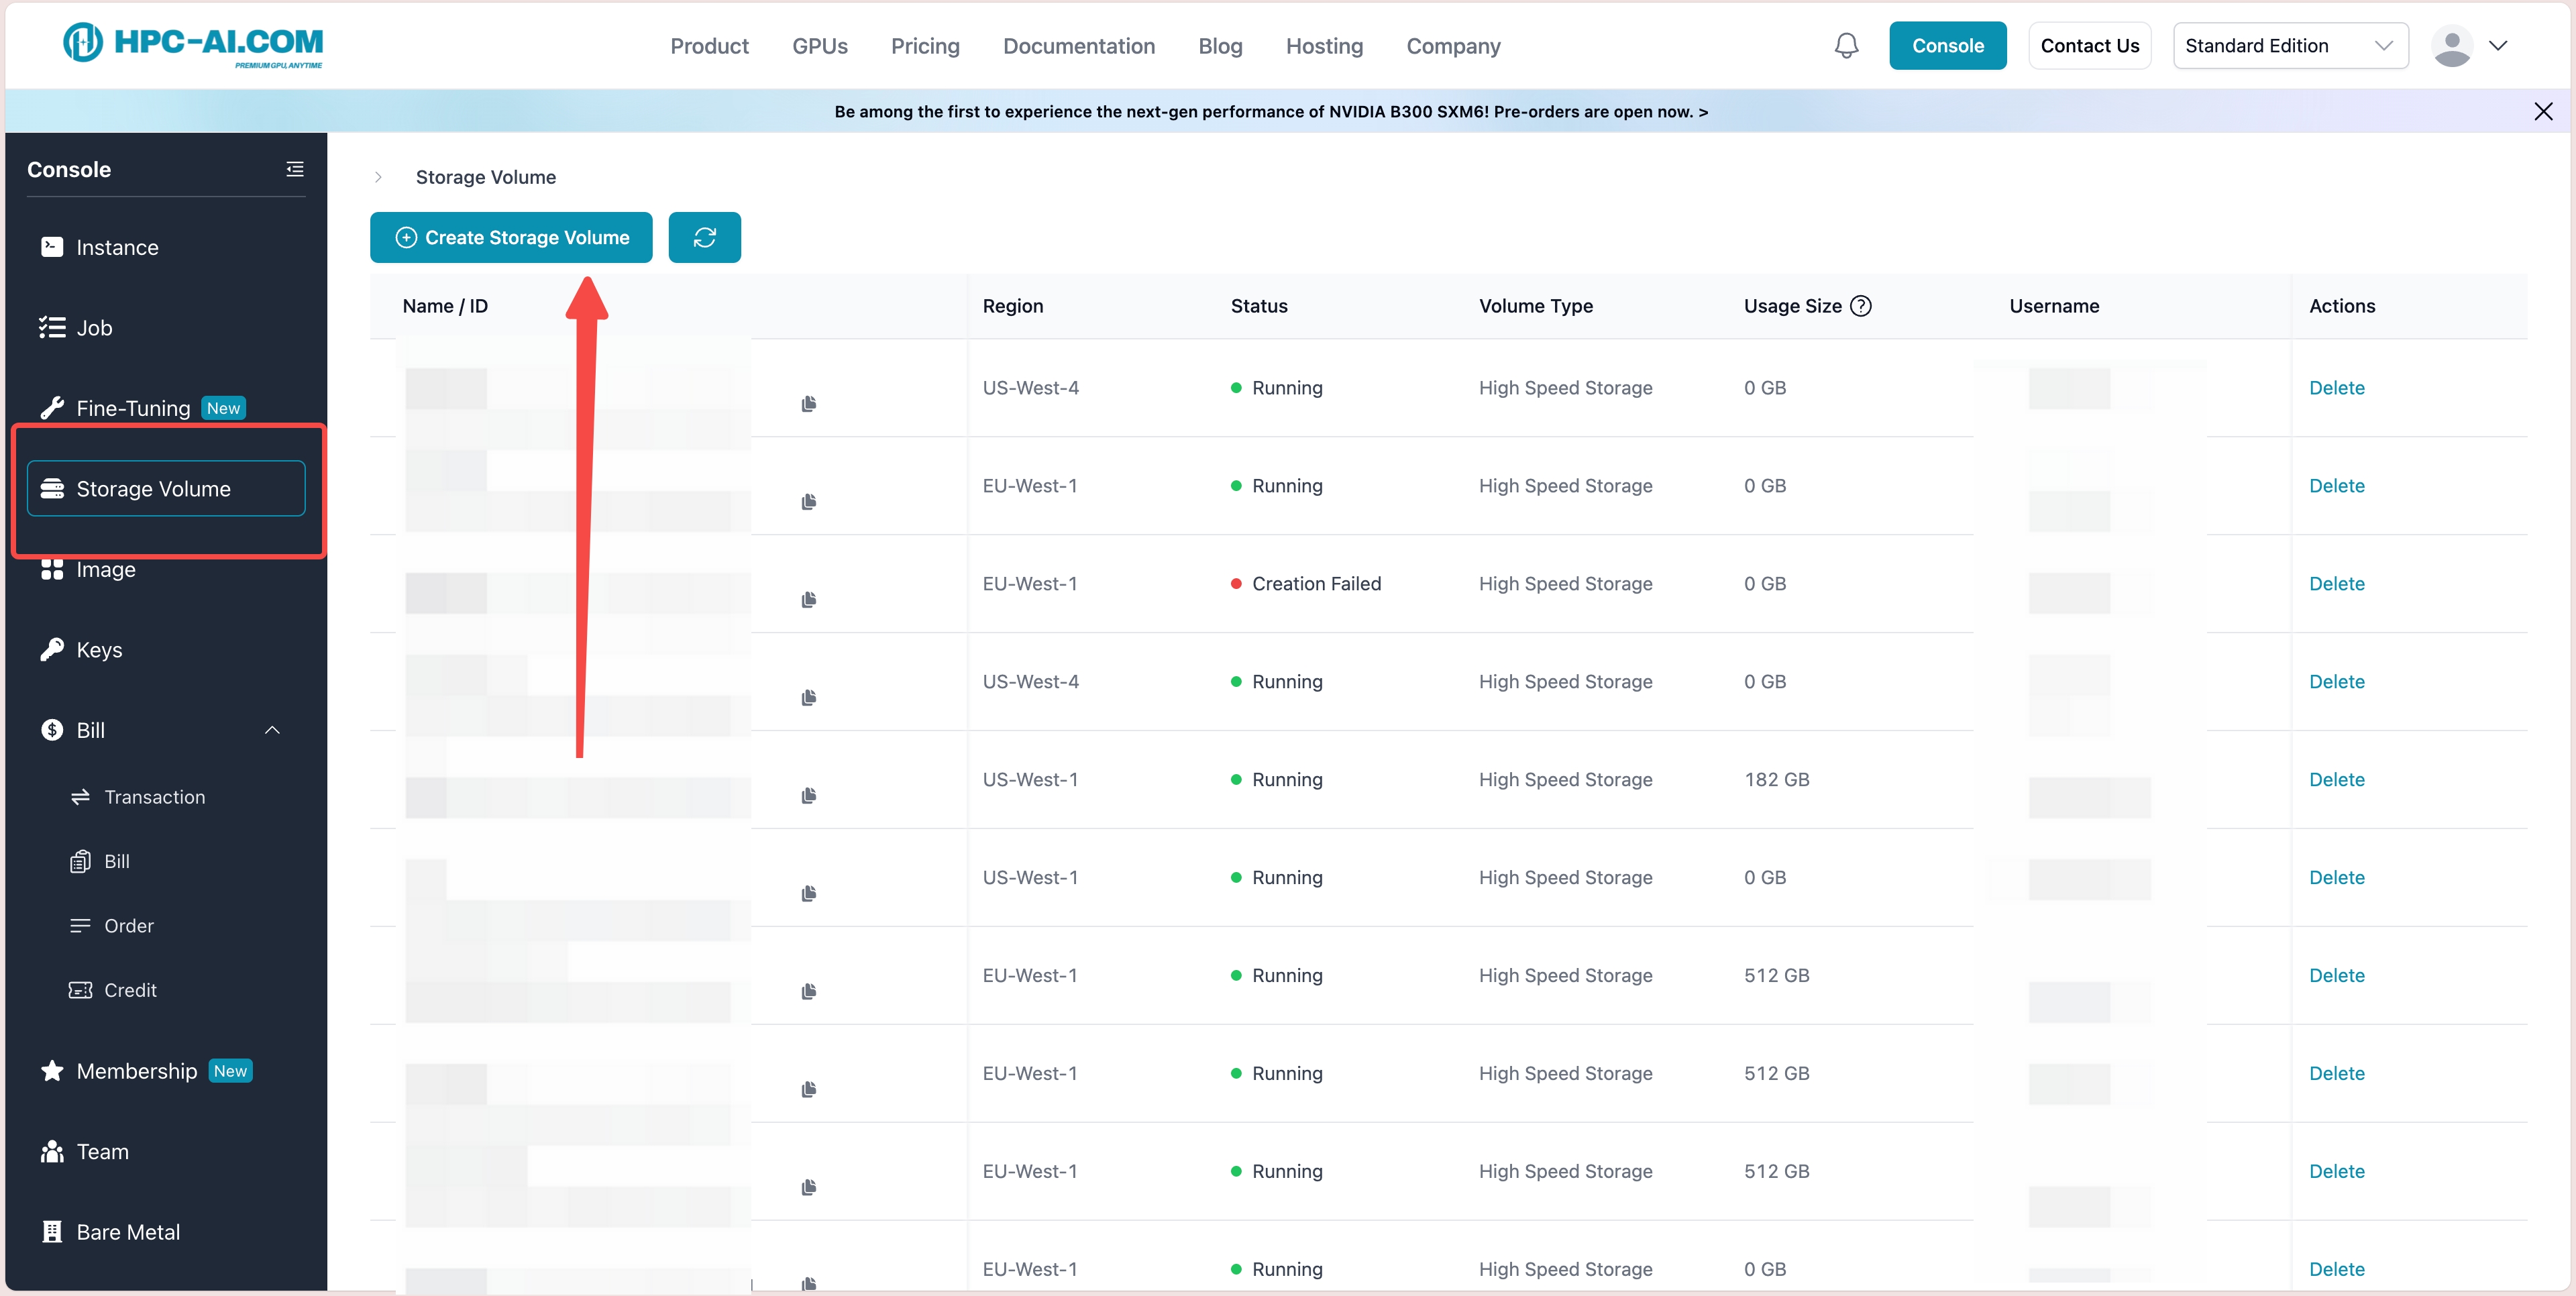
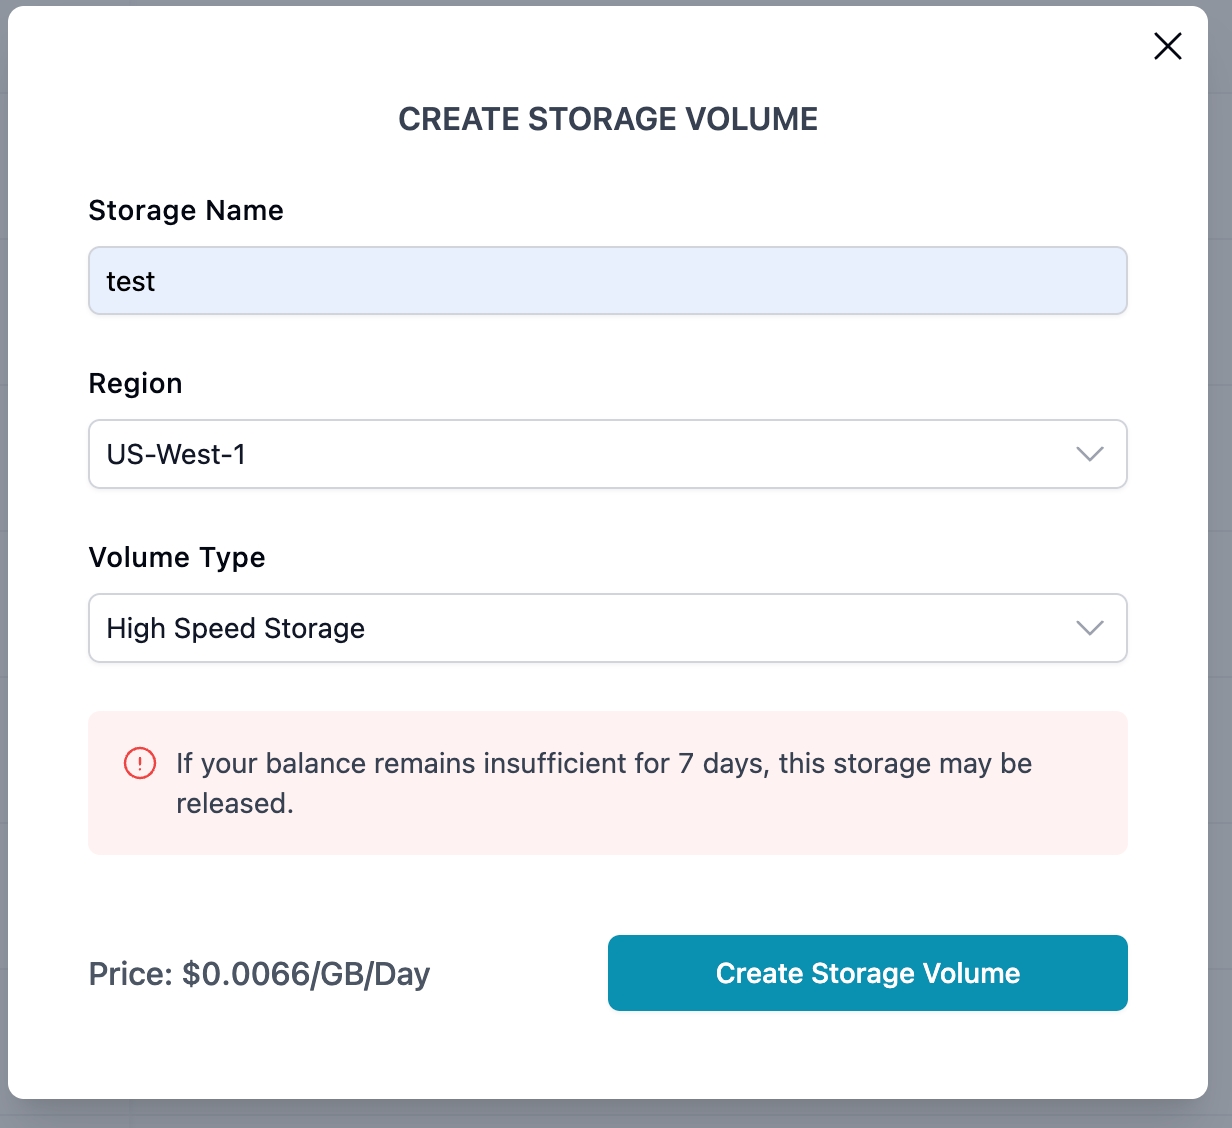
To create Storage Volume, open the Console and go to the sidebar, select Storage, and click Create Storage Volume.
For information about billing rates, visit the Billing page or check the FAQ section.
After creating a name for storage and selecting the type of storage, you will need to determine the capacity when creating it. But don't worry about the storage capacity for now! You can expand it anytime after creation.
Now that your Storage Volume is created, you can start using it to store and manage your data.
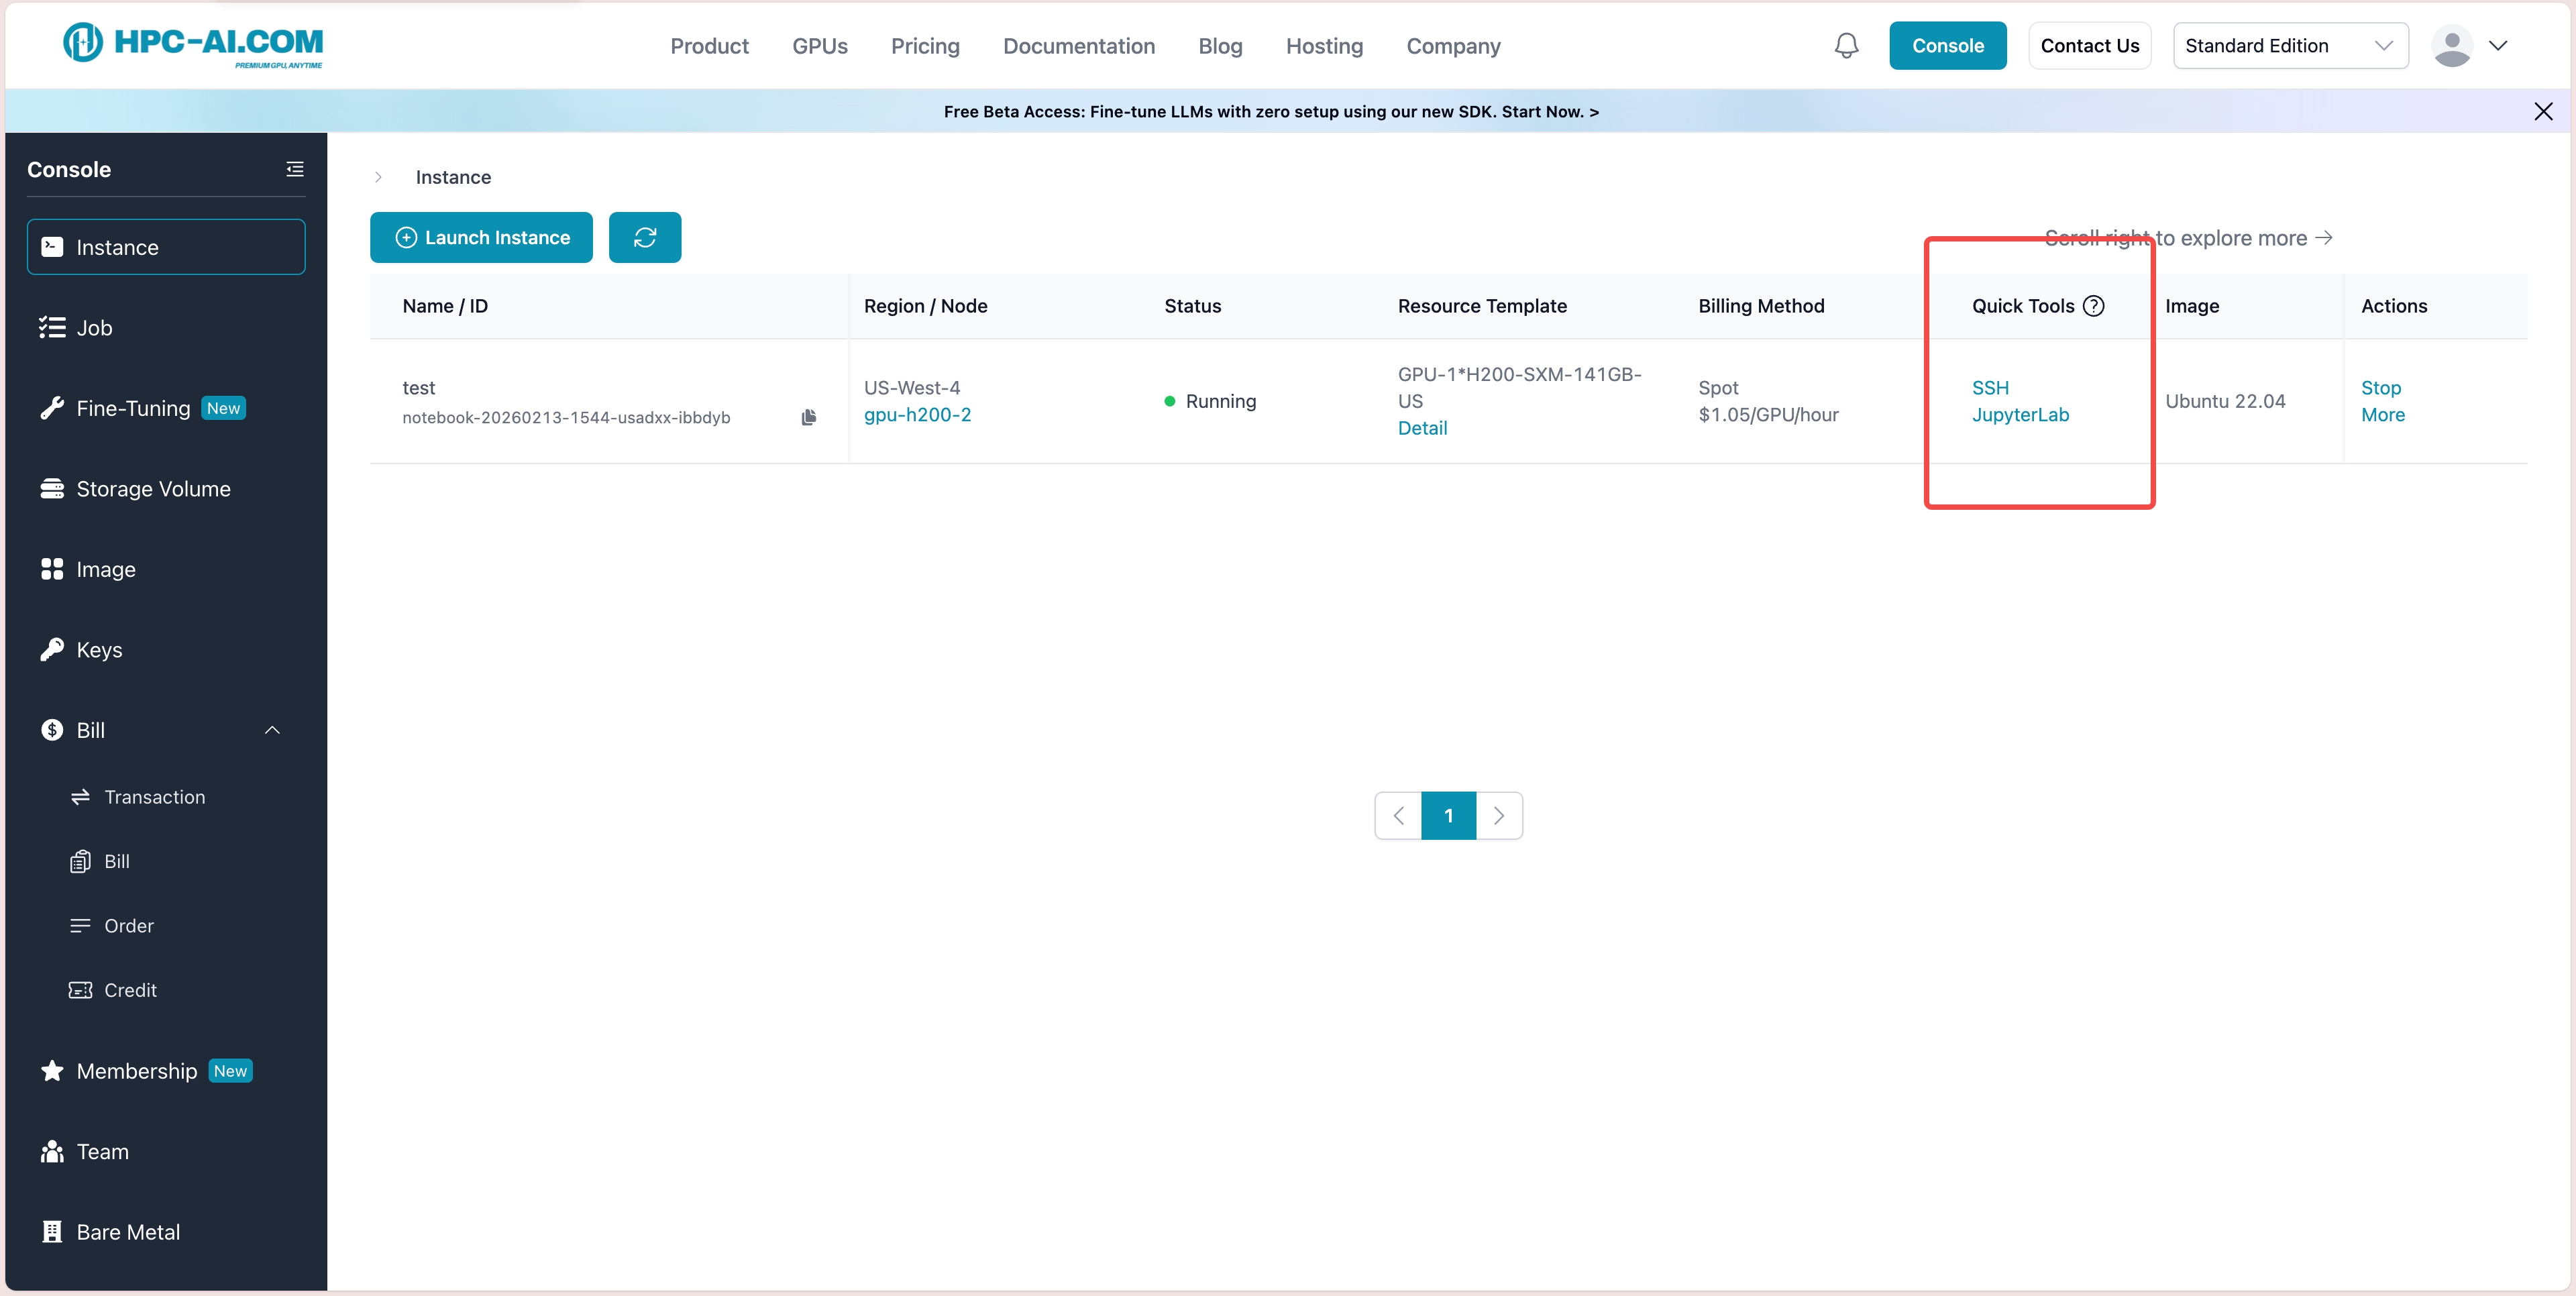
Connect to Your Instance
There are two ways to access your GPU instance once its status is 'Running':
-
Click the JupyterLab button to access the instance via the web interface.
-
Copy the SSH command to connect to the instance via terminal.
SSH Connect Command Example:
ssh root@<ip-address> -p <ssh-port>
JupyterLab User Interface
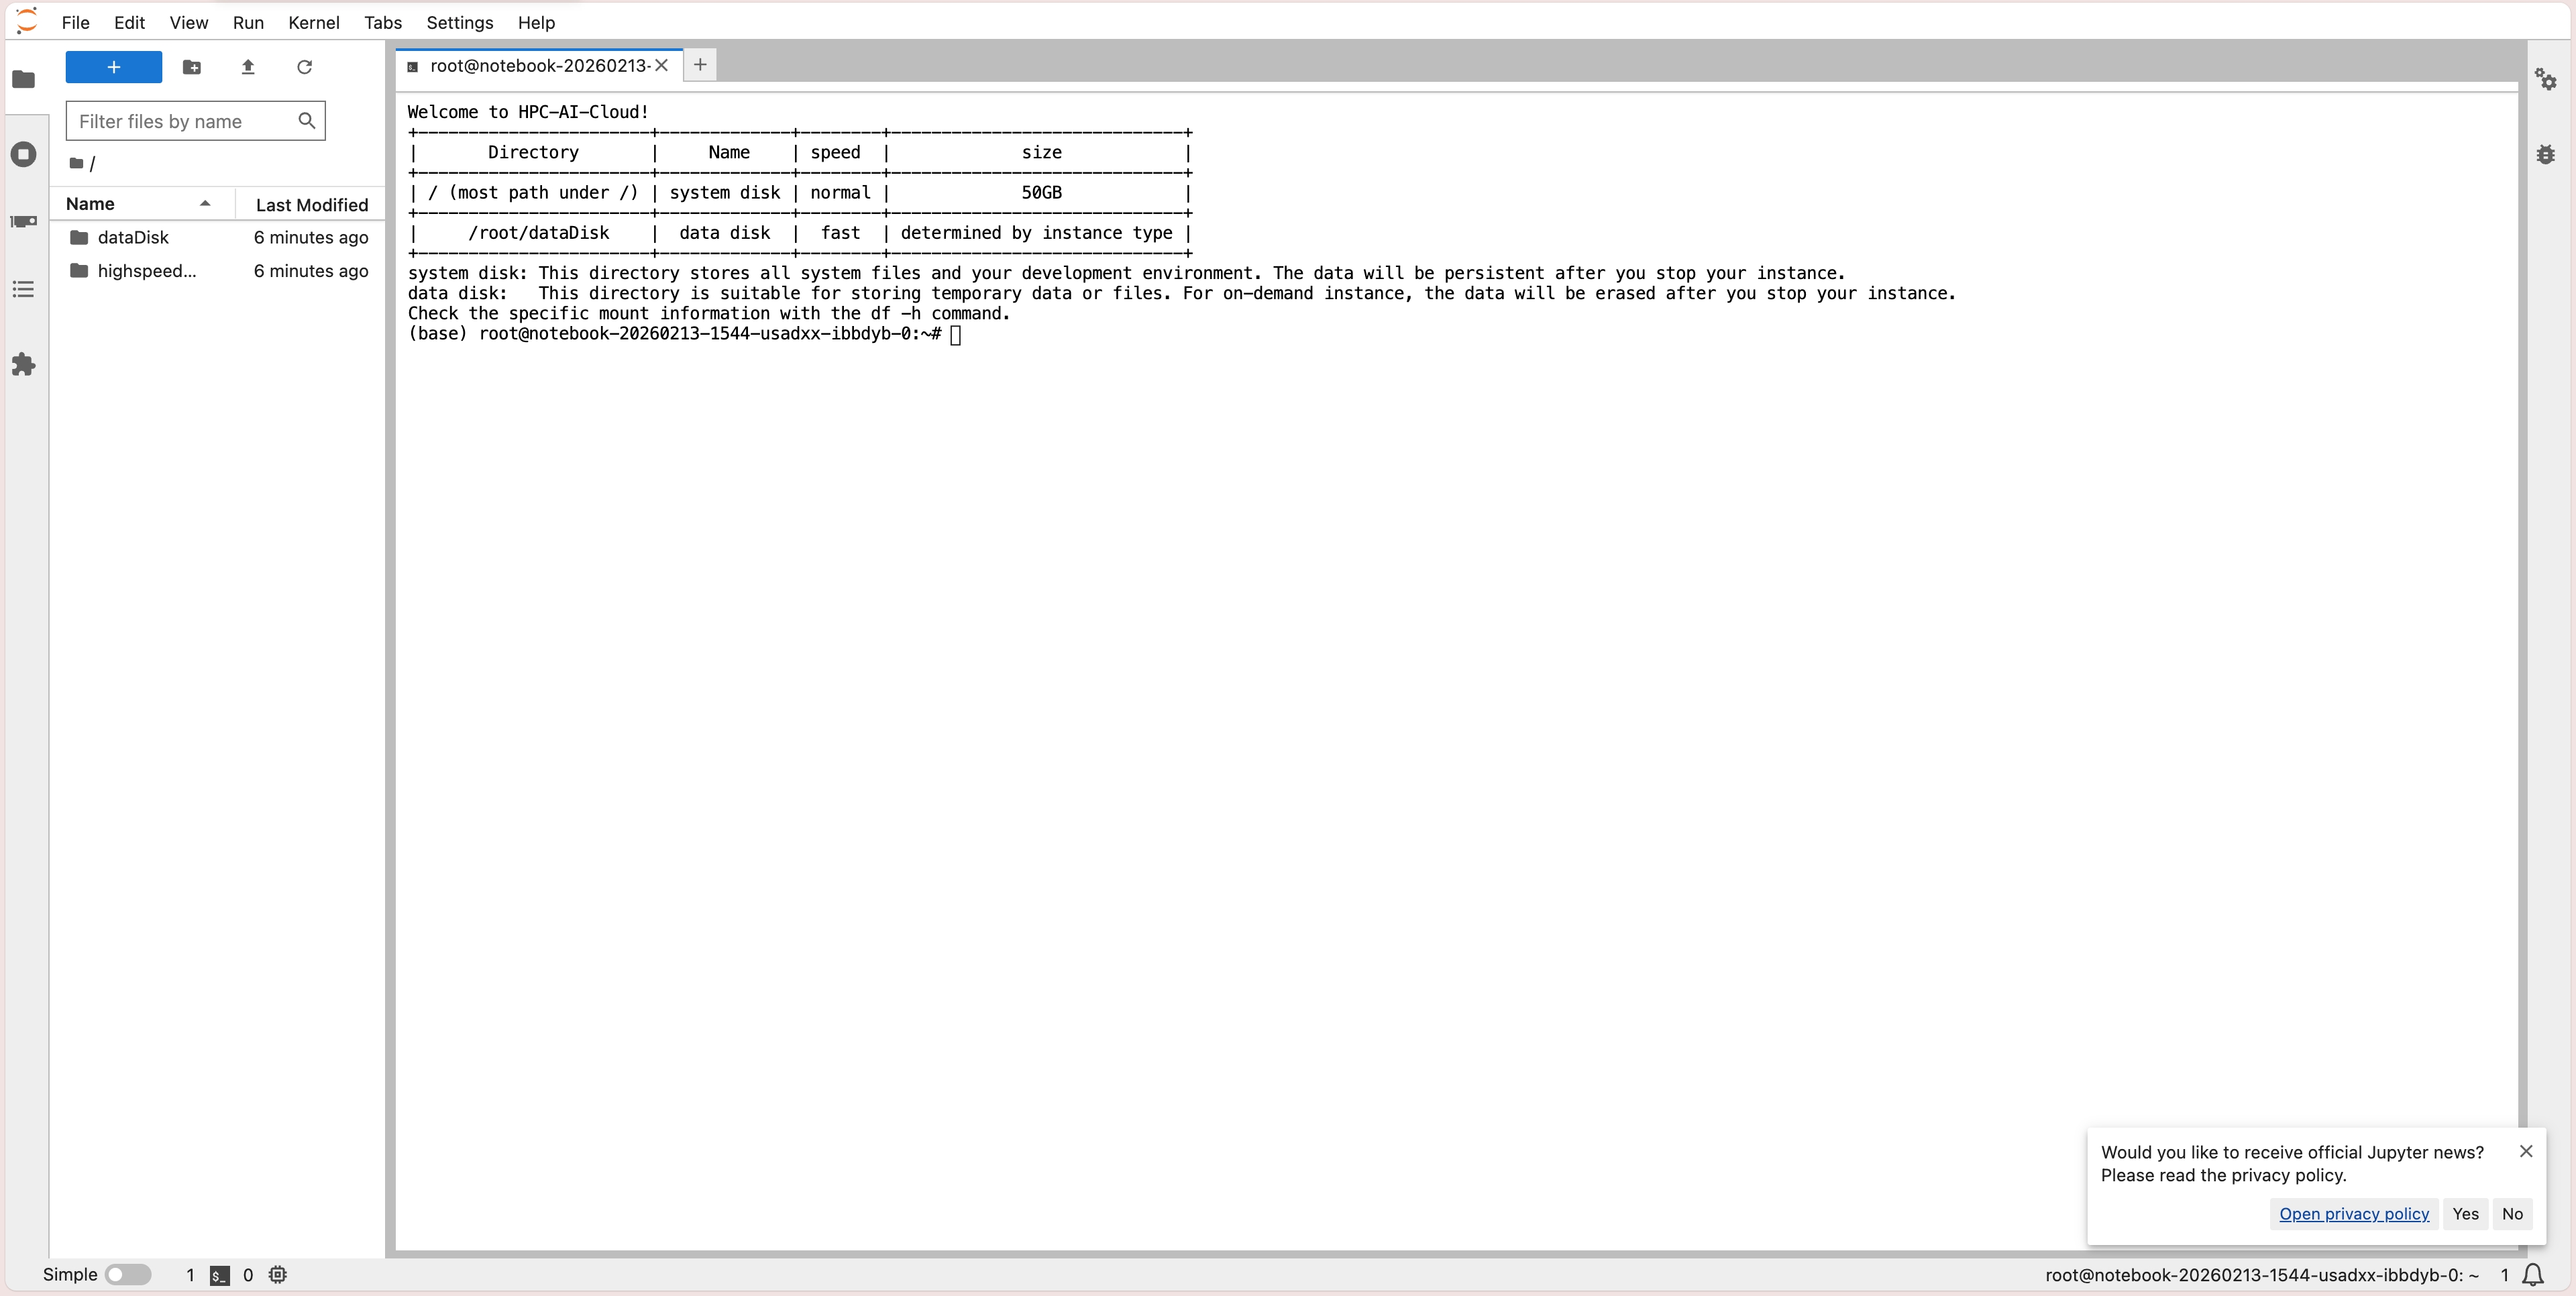
You now have full access to the computing resources you requested. Enjoy deploying applications on these powerful machines!
Stop and Terminate Your Instance
We understand that GPU resources can be expensive, so once you’ve finished all your tasks, you can stop your instance to avoid ongoing costs. However, please keep the following in mind:
- Stopping the instance will stop incurring computing costs, but Storage Volume will still be billed.
- Your deployed environment, including all the packages you have used, will be saved after the instance is terminated (we will update this feature soon).
- Data on the instance (excluding the deployed environment) will be cleared after termination. To preserve your data, we recommend using **Storage Volume **.
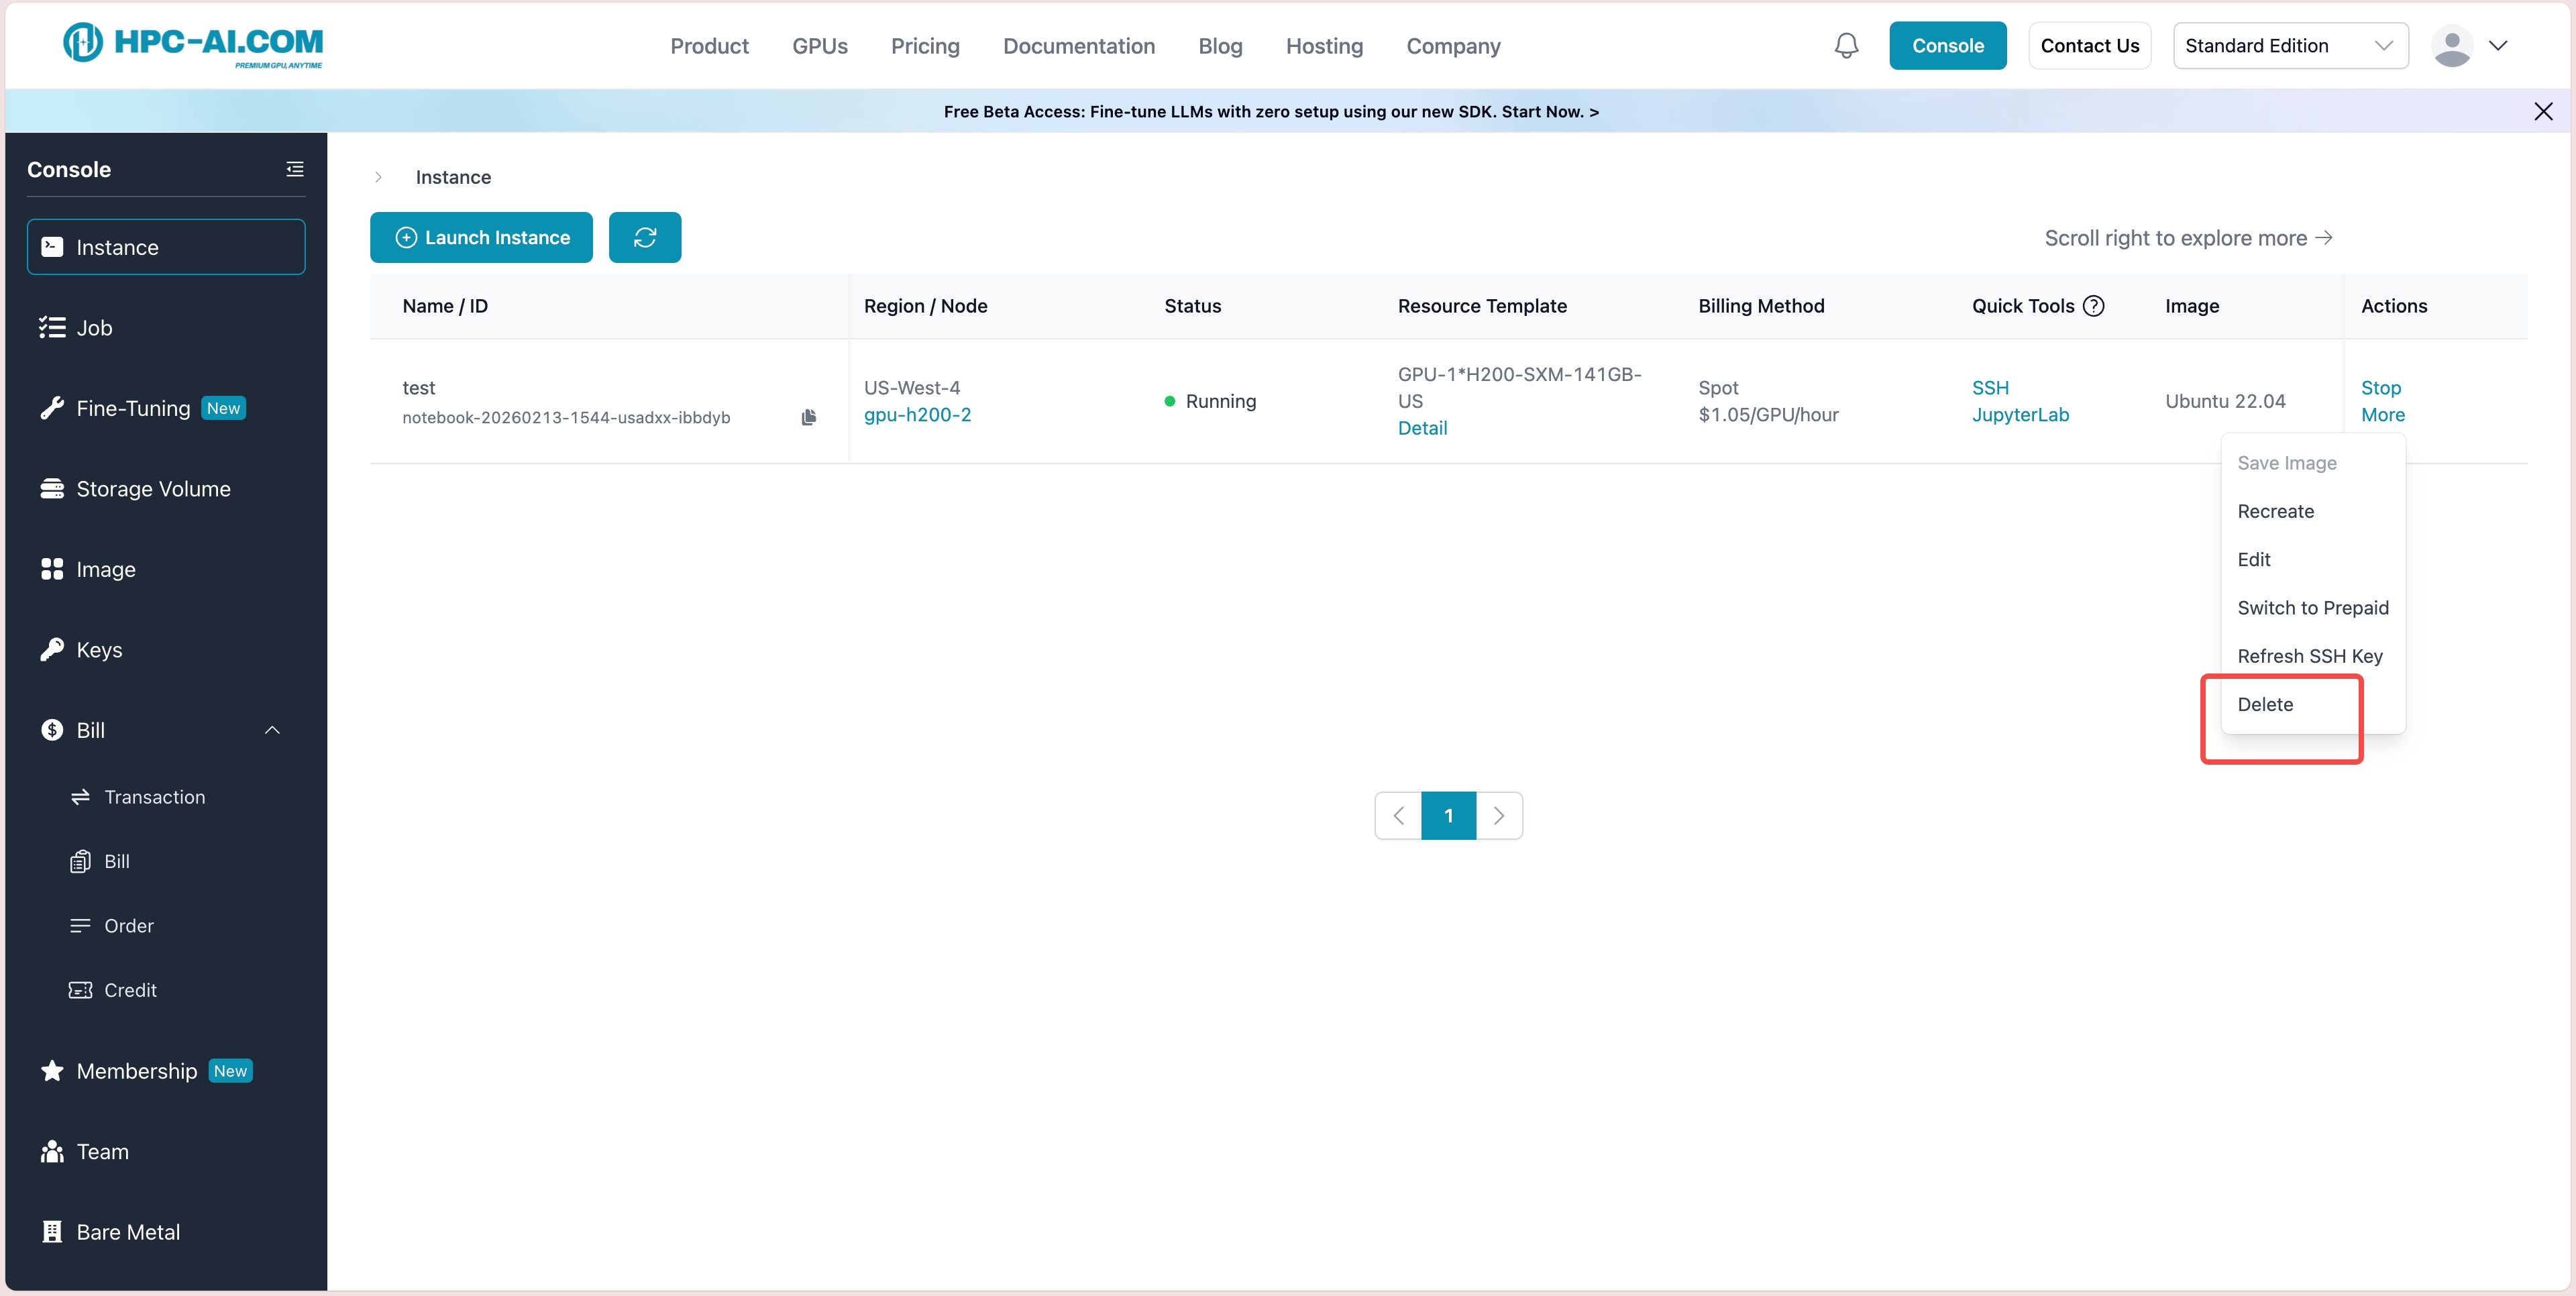
You can stop an instance by clicking the 'Stop' button in the ' instance' list.
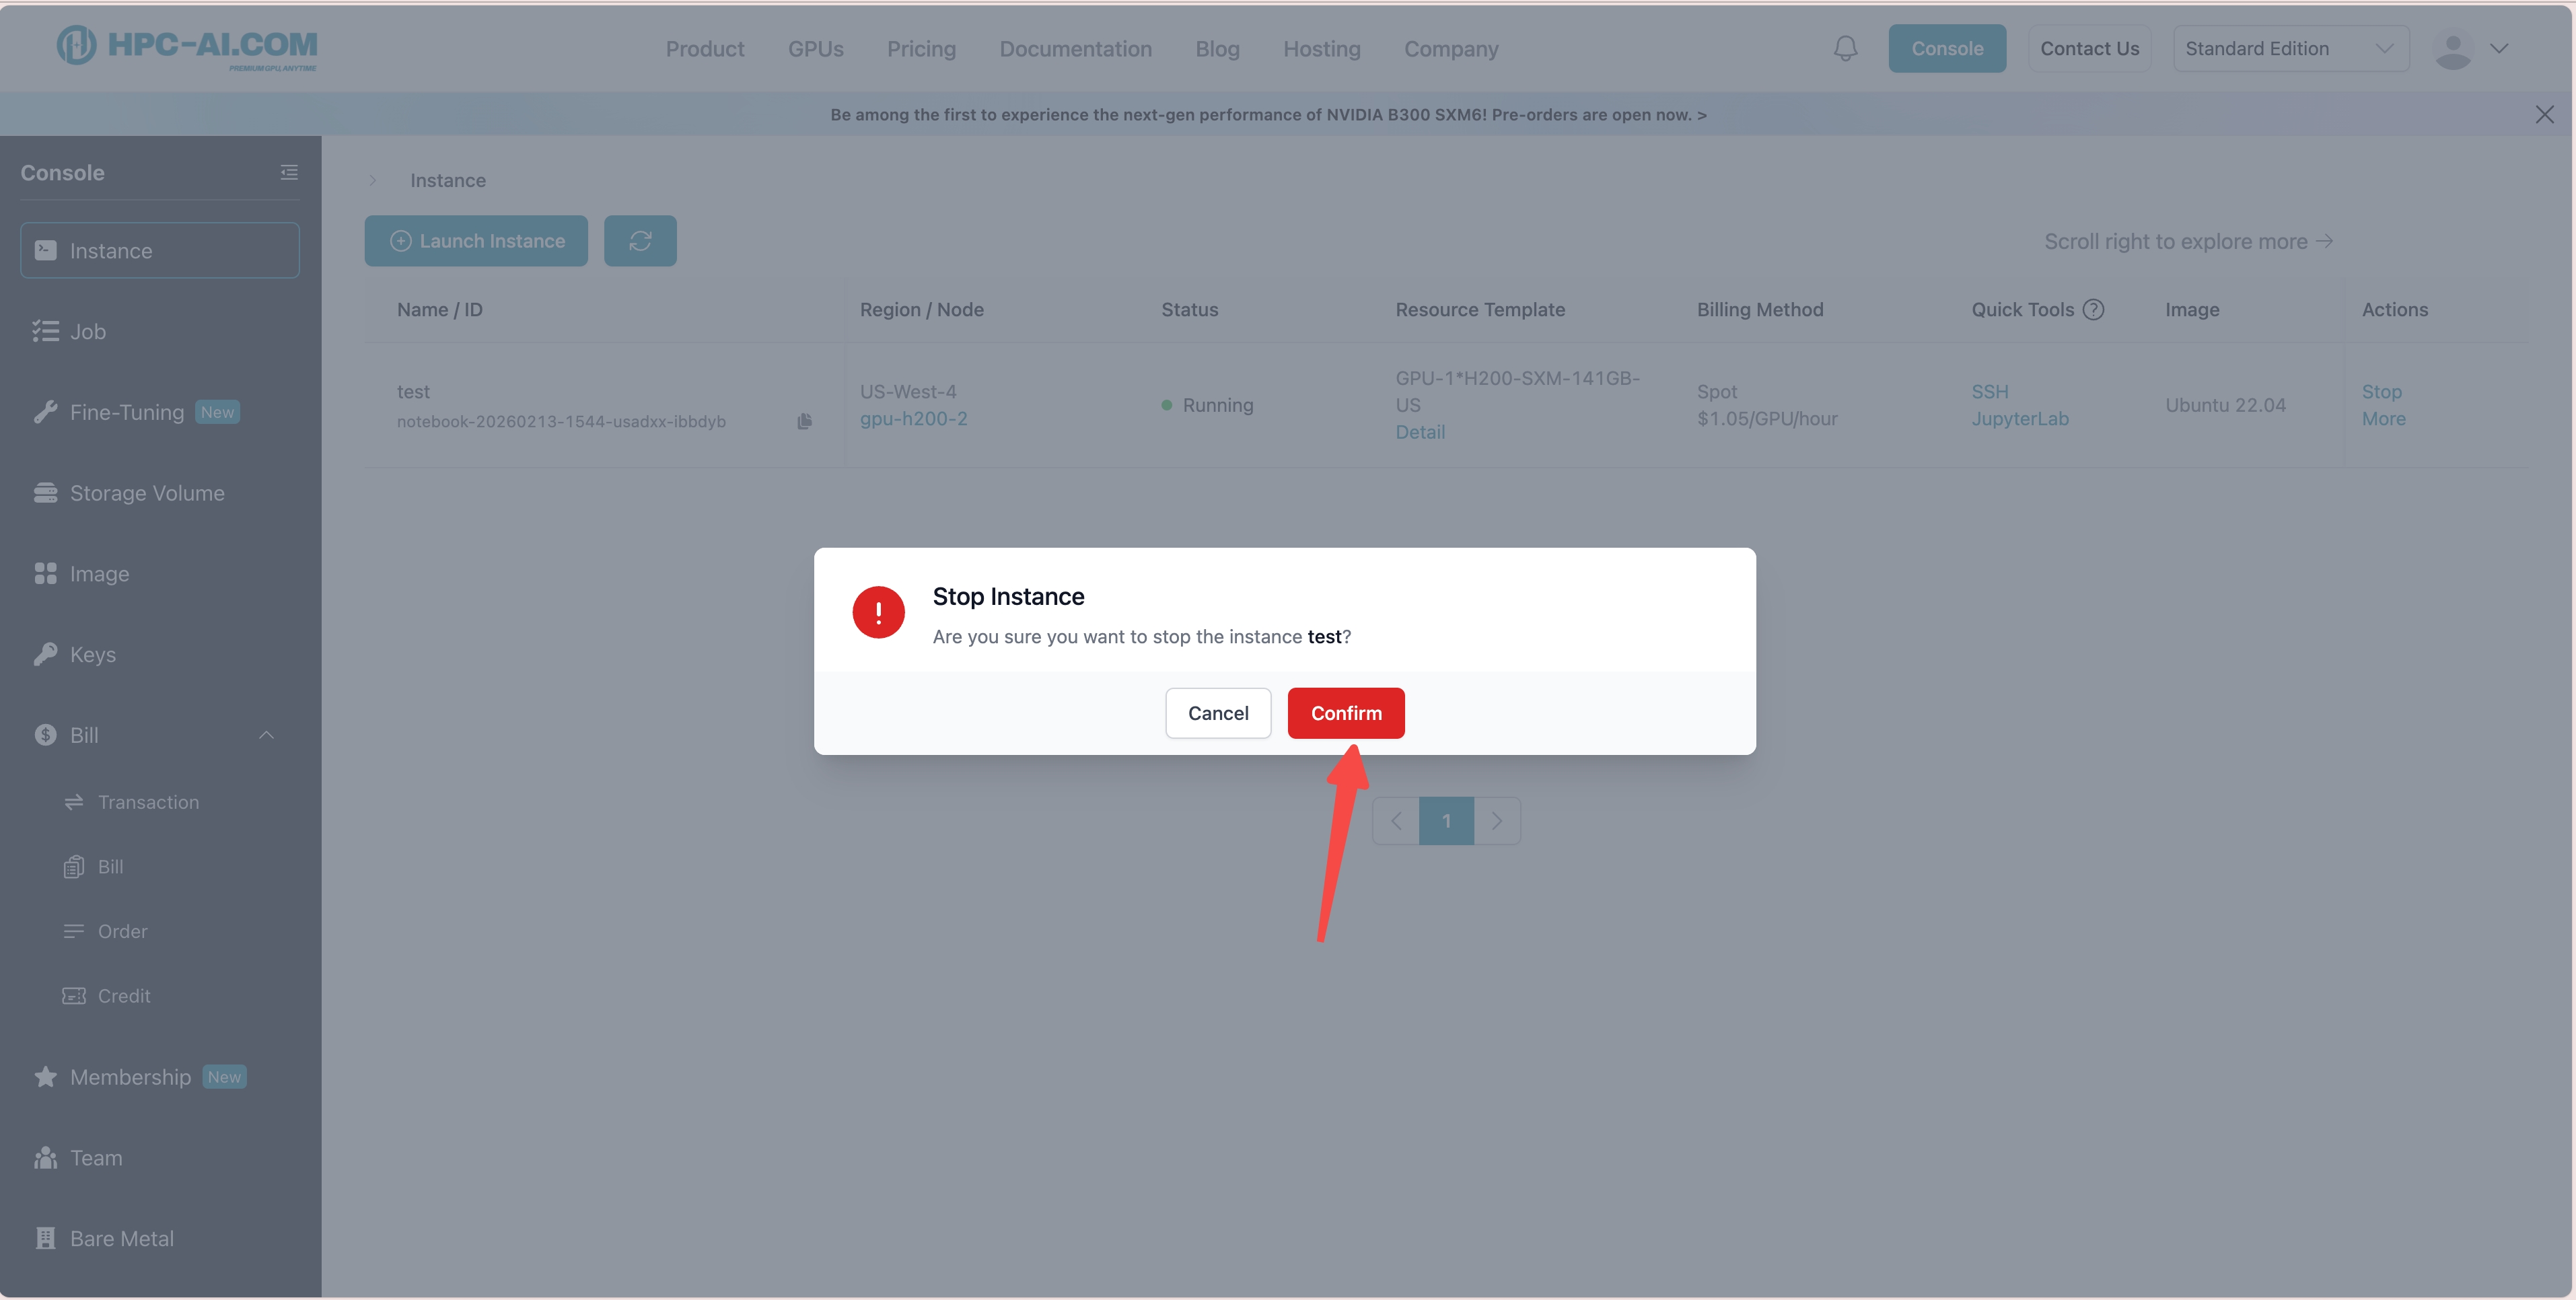
If you want to permanently remove the instance, click 'More' and then click 'Delete'. The instance will be removed from the 'Instance' list and cannot be recovered.